
The Ultimate Guide to Taking a Screenshot
Learn How to Take A Screenshot Multiple Ways for increased Productivity
Need to Download PaintShop Pro?
Download a Free 30-Day Trial Now!
Table of Contents
If you operate in the digital world, screenshots are now a vital component to communication. A screenshots allows you to capture your screen and share it with others in a compelling, accessible manner. Instantly enabling you to communicate what you’re seeing on screen to co-workers, supervisors, colleagues and partners in a clear, concise manner.
No matter where you work, you’ve probably captured an image of your screen to add visuals to a report or presentation, or to communicate a complex idea when words fail to do so.
From creative markups, design feedback, composition editing, to so much more, screenshots communicate effectively using any existing image, document, or any other on-screen element.
Here are the 5 best ways to take a screenshot
Operating System Based = Print screen button/Mac Hotkeys
What it is: Windows and Mac OS both have screen capturing functionality baked into the operating system that allows you to capture either your entire screen or a specifically designated portion. Using the Print Screen button on your keyboard takes a screenshot and gives you three options. You can: Save it as a file, take a screenshot without saving it as a file, or take a screenshot of only one window (as opposed to the whole screen). Mac computers also allow you to select a specific portion of your screen.
Pros:
- This functionality comes standard with your operating system and does not require any kind of installation.
- Since it’s standard software, it’s also free.
Cons:
- After you take the picture, it’s difficult to share.
- Any editing beyond basic cropping and annotation requires importing a saved image into a 3rd party image editor.
How to use:
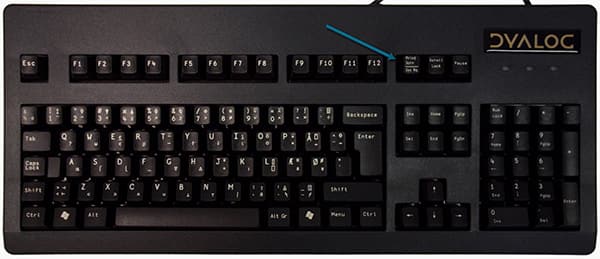
- For Windows OS To Save Screenshot to Clipboard:
- Press the “Print Screen” key. Depending on your computer model, the print screen key can vary and may be labeled “PrtScn,” “PrntScrn,” “Print Scr,” or similar (If you’re using a laptop computer, you may need to also press the “Function” or “Fn” key).
![How to take a screenshot]()
- When you press the key, it will look like nothing happened, but the screenshot has been saved to your clipboard. You can now paste it into any program.
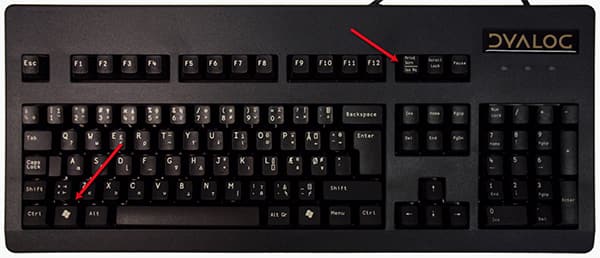
- Press the “Windows Logo” + “Print Screen” keys
- Screenshots will automatically appear in the “Screenshots” folder place within “My Pictures” and will be labeled with a number.
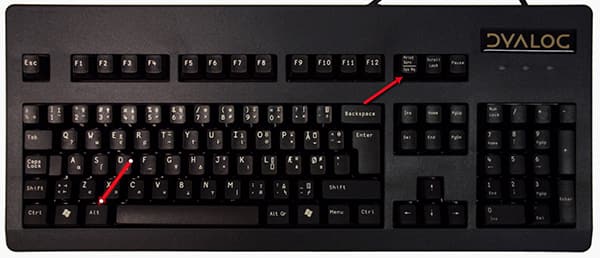
- Click on the title bar of target window
- Press “Alt” + “Print Screen"
- Continue as above.
To Save Screenshot as a File:![How to take a screenshot on windows]()
To Save Screenshot Of Single Window:![How to take a screenshot on PC]()
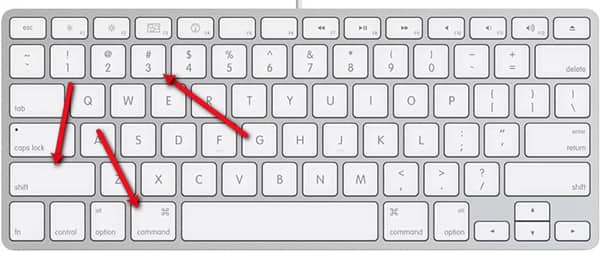
- Mac OS To Save Screenshot as a File:
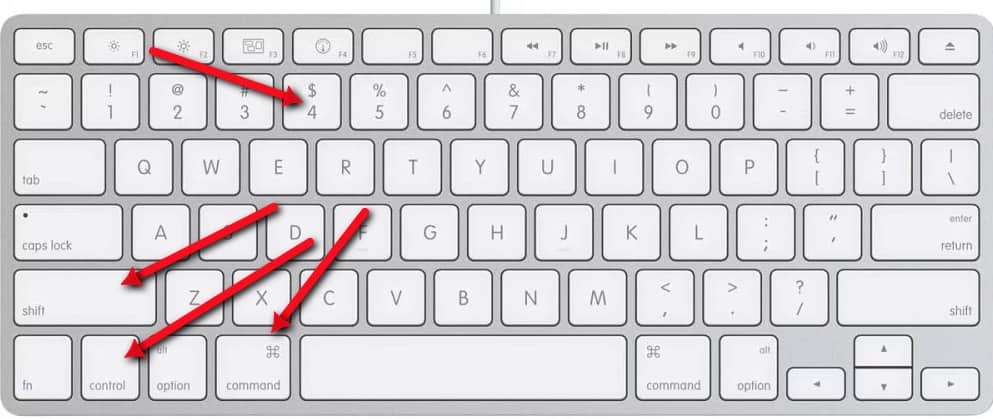
- Press the “Command” + “Shift” + “3” keys. If your sound is on, you should hear a camera shutter noise that indicates that your screenshot was successful.
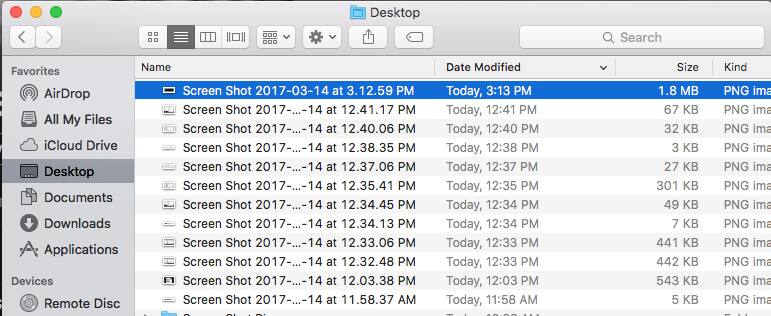
- Your screenshot will automatically be saved to your desktop as “Screenshot_{Current Date/Time}”
- Pro Tip: If you have multiple displays, each screen will be saved in a separate image.
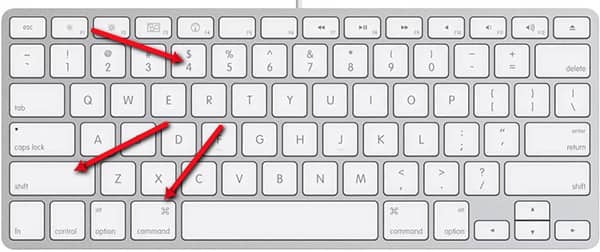
- Press “Command” + “Shift” + “4” at the same time.
- Use the your mouse to position the crosshair cursor at the corner of your desired screenshot area.
- Click and drag the crosshairs to the opposite corner of your desired screenshot area.
- Pro Tip: You can hold down the “Shift” key to lock all sides other than the direction you’re currently moving your mouse.
- When you are satisfied with the capture area, release your mouse to capture everything within your screenshot. You should hear a camera shutter noise that indicates that your screenshot was successful.
Need to Download PaintShop Pro?
Download a Free 30-Day Trial Now!
- Pro Tip: If you need to re-draw your area, either right-click or press the “Escape” key to cancel the screen capture.
- Your screenshot will automatically be saved to your desktop as “Screenshot_{Current Date/Time}”
- Press “Command” + “Shift” + “4” at the same time.
- After releasing the above shortcut, press “Spacebar” to turn your cursor into a camera icon.
- Use the camera cursor on top of the desired window. The selected window will shift tint to let you know which window is about to be screenshotted.
- Click your mouse to take the screenshot. You should hear a camera shutter noise that indicates that your screenshot was successful.
- Your screenshot will automatically be saved to your desktop as “Screenshot_{Current Date/Time}”
- Perform any of the above screenshot operations but just add “Control” to the shortcut combination. For example: “Command” + “Shift” + “CONTROL” + “3”.
- Navigate to the desired document or image editor and press “Control” + “V” or select the “Paste” tool to copy the screenshot from the Clipboard.
Browser based
What it is: Google Chrome and other browsers offer a number of extensions that help you capture and share your screen, etc.
Pros:
- Flexible.
- Easy.
- Only a click or two away from activating.
Cons:
- Only take shots within your browser.
- Depending on the extension or plugin, it may be clunky in how you interact with your images after you’ve taken them.
- May require 3rd party account creation and sign-in.
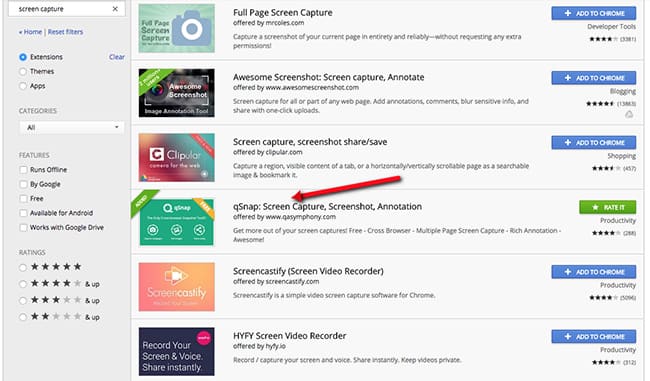
How to use: (for demonstration purposes, we selected “qSnap“)
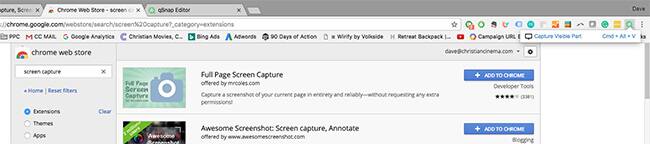
- Navigate to the Chrome Web Store and search for “Screen Capture”
- Select desired extension and click “Add To Chrome”
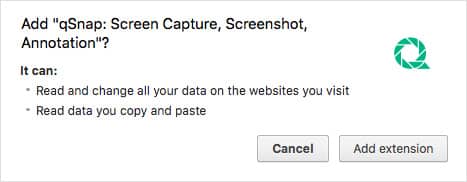
- A confirmation box will appear. Click “Add Extension” to install to your browser
- Navigate to a screen you wish to capture and click the qSnap icon in the upper right hand corner of your screen. When the drop down menu appears, select the “Capture Visible Part” option to capture your screen.
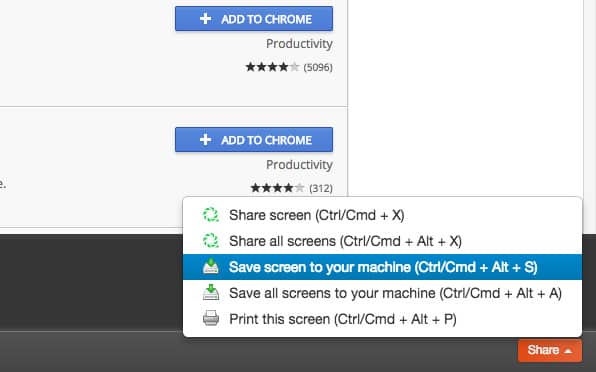
- Click “Share” in the lower right hand corner and choose how you wish to share or save your screenshot.
![Screenshot apps]()
![How to add a screenshot app to your browser]()
![Using browser plugin to capture screen]()
![Sharing screenshot from browser plugin]()
Take a selfie with your screen
What it is: Using your cell phone, take a candid shot that includes both you and your screen.
Pros:
- It’s Fun.
- It’s Easy. It allows you to demonstrate personality.
- Fairly easy to share your image via text or email.
Cons:
- Extremely casual.
- Once you have taken your image, its very difficult to edit or annotate so you’re basically stuck with your initial photo.
- It may require hair-styling, makeup, and wardrobe changes.
Pro Tip: For better area coverage, a selfie stick may be required.
How to use: (for demonstration purposes, we selected “qSnap“)
- Navigate to desired screen
- Enter “Selfie Mode” on your cell phone
- Pose coquettishly
- Press the “Capture” button on screen
- Repeat 20-35 times until the light is just right
- Send screenshot via email or text
![Selfie screenshot]()
Use a free software solution like the Windows Snipping Tool
What it is: There are a few screen-capturing software programs available for free. These programs either come standard or are downloaded and are either run in the background until needed, or are required to be started on demand.
Need to Download PaintShop Pro?
Download a Free 30-Day Trial Now!
Pros:
- Free. Flexible in the area of screen that you can capture.
Cons:
- The Windows snipping tool does not allow you to capture any mouse activated elements like pop-up menus, tooltips, or rollover messages.
- File will save in .jpg file format which may result in quality loss.
- Any editing beyond basic cropping and annotation requires importing a saved image into a 3rd party image editor.
How to use:
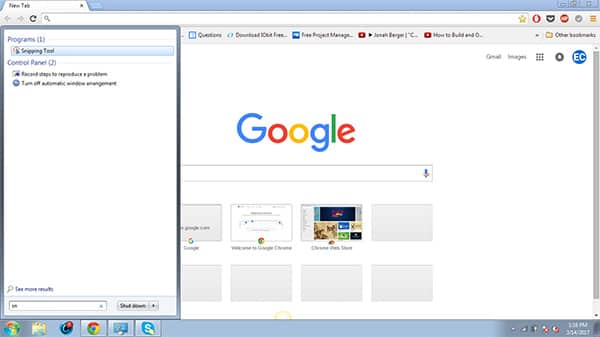
- Open Windows Snipping Tool
- Select the type of snip you wish to make by clicking the dropdown arrow next to “New.” You can choose:
- Free-form - Draw the area you wish to snip
- Rectangular - Draw the rectangle area you wish to snip
- Window - Select a single window to snip
- Full-screen - Snip everything on your screen
- Click and drag your cursor to select the desired area.
- Save image to desired location.
![Using free screenshot software]()
![Using windows snipping tool]()
![How to take a screenshot with windows snipping tool]()
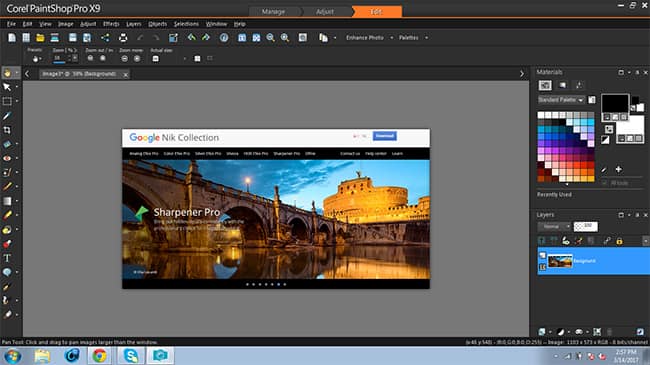
Use PaintShop Pro
What it is: PaintShop Pro is a full stack photo editing software that contains a tool designed to put you in control of your screenshots. From capturing, to editing, to annotating, to sharing - this custom tool makes it easy to take control.
Pros:
- Gives you great looking screenshots with minimal effort.
- Easy to use.
- Supports multiple file formats.
- Allows you to take screenshots, edit, annotate, and share all from the same application.
Cons:
- Requires a purchase.
- Requires PaintShop Pro to be open and running in order to use.
How to use:
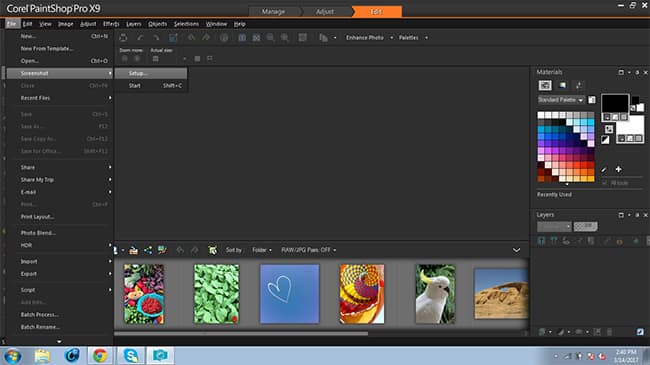
- Open PaintShop Pro and navigate to the “Edit” workspace
- From the “File” Menu, navigate to “Screenshot” and select “Setup”
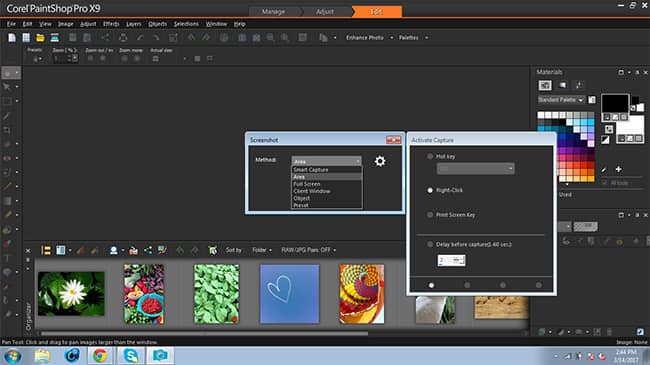
- In the Capture Setup window, select the type of capture (in our case, we’ll use “Area”) and prefered hot key or method of control to activate your screen capture. Then select “Start”
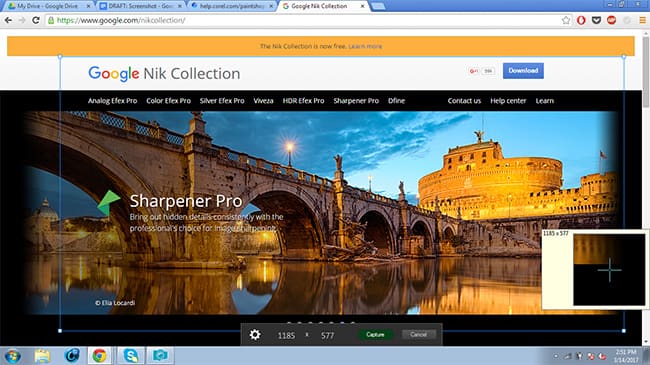
- Navigate to the area you wish to capture and press your hotkey. Your cursor should turn into a plus sign. Click and drag until the box contains everything you want to capture. Once you are satisfied, click the “Capture” button.
- PaintShop Pro will automatically maximize and with your screen capture imported and ready for annotation, editing, saving, and sharing.
![Using PaintShop Pro to take a screenshot]()
![Example of taking a screenshot with PaintShop Pro]()
![Capturing screen with PaintShop Pro]()
![Use PaintShop Pro for your next screenshot]()
![Editing screenshots in paintshop pro]()
To Save Screenshot of Part of Your Screen as a File:
To Save Screenshot of a Single App Window as a File:
To Save Screenshot Directly To Your Mac Clipboard:


If you want to try out PaintShop Pro, check it out for free before you buy it. Once you try it, it’ll be hard to go back to Windows’ barebones tools.
Need to Download PaintShop Pro?
Download a Free 30-Day Trial Now!