How To Remove Noise From Image
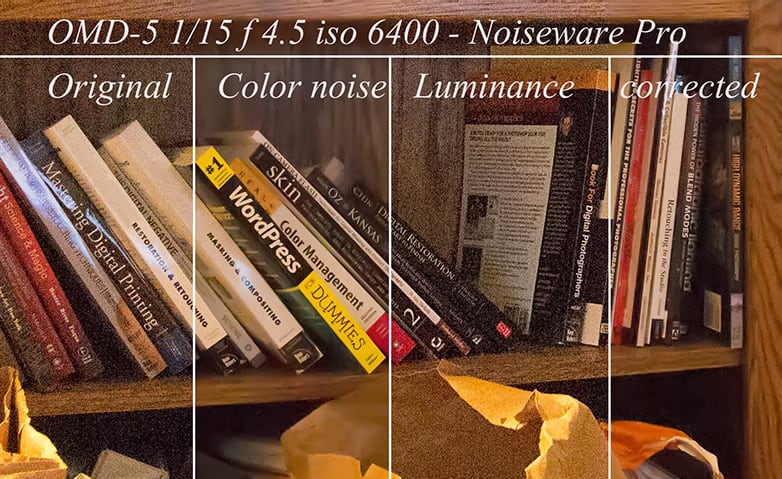
Image noise or image grain is a term for visual distortion on your photo. The amount of noise can fluctuate based on your camera settings and lighting conditions - the lower the available light, the more grain will affect your image. While it can lend an artistic effect to a picture, you may want to remove the noise using PaintShop Pro. Keep reading to learn how to remove noise from your images.
Corel PaintShop Pro gives you many ways to remove various types of noise, and it even lets you add noise to an otherwise “clean” photo. You can make the following corrections by applying them to a selection or an entire image.
To remove noise in photos taken in low light conditions
1. Install PaintShop Pro
To install PaintShop Pro photo editing software on your PC, download and run the installation file above. Continue following on-screen instructions to complete the setup process.
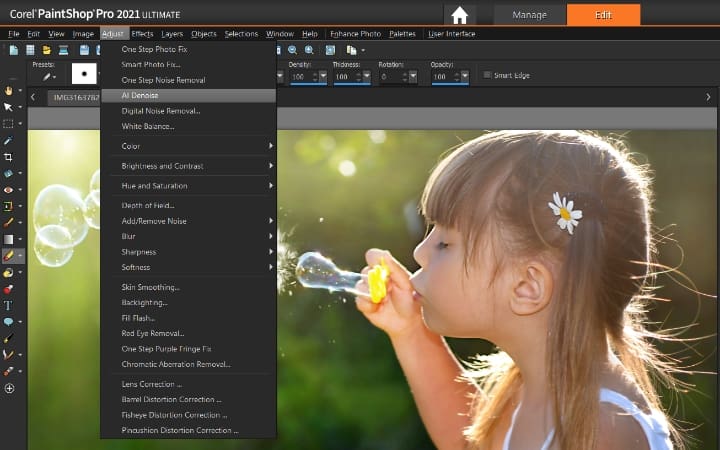
2. Select AI Denoise
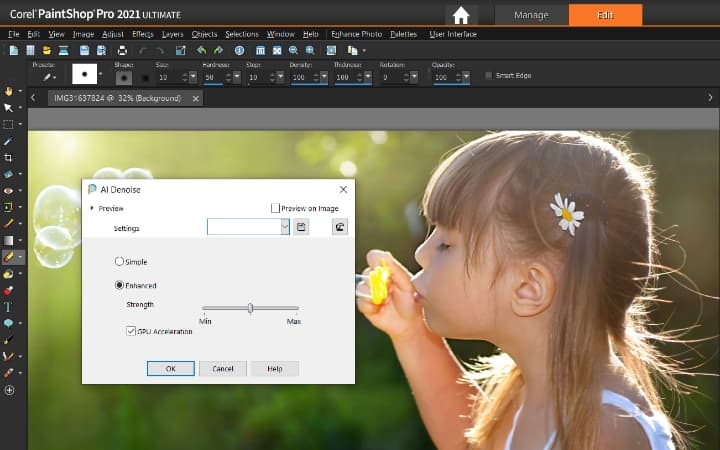
Choose Adjust > AI Denoise. Select Simple for quick noise removal. Select Enhanced to be able to controls the strength. Click Ok.
AI Denoise feature can also be accessed from the Photography Workspace.
To continue improving particularly noisy images, follow the below steps.
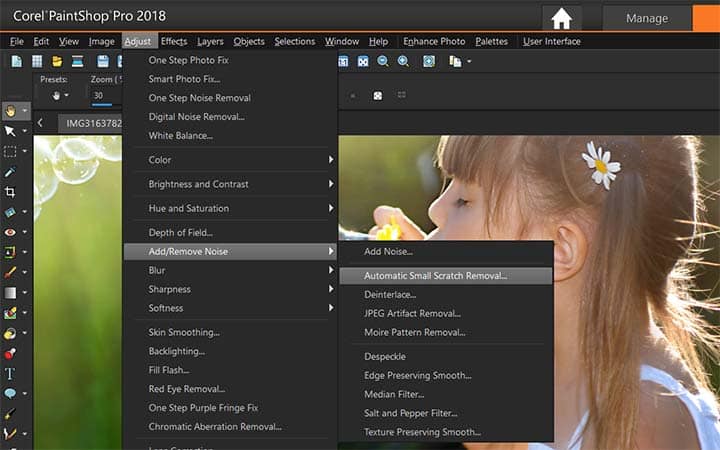
3. Select Automatic Small Scratch Removal
Choose Adjust > Add/Remove Noise > Automatic Small Scratch Removal. The Automatic Small Scratch Removal dialog box appears.
4. Select scratch type
Mark one or both of the following check boxes:
- Remove dark scratches — removes scratches that are darker than the background.
- Remove light scratches — removes scratches that are lighter than the background.

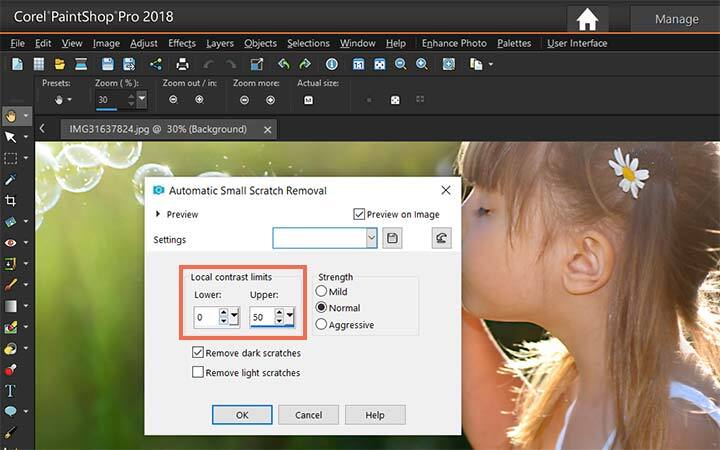
5. Adjust Local Contrast
In the Local Contrast Limits group boxes, type or set values in the Lower and Upper controls to set the contrast between a scratch and its background.
Increase the Lower control setting to just below where scratches reappear. Decrease the Upper control setting to just above where the scratches reappear.
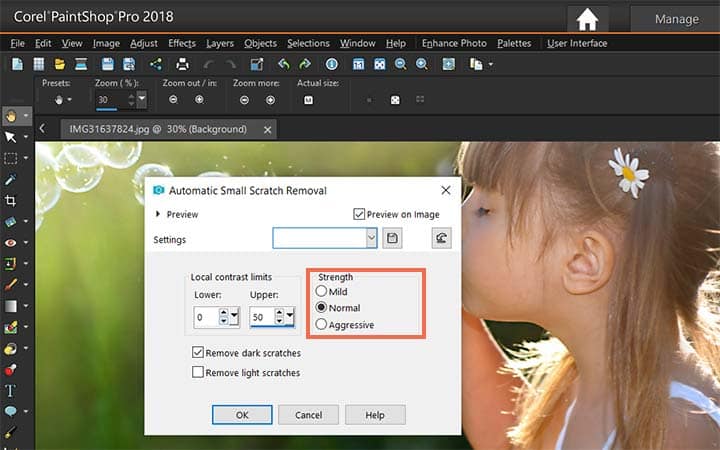
6. Set Strength level
In the Strength group box, choose an option to set the strength of the scratch removal:
- Mild
- Normal
- Aggressive
Note: Select the lowest setting that removes scratches. Examine all areas of the image to make sure that important details are not lost.
Click OK.
To limit the correction to a specific area, make a selection. The command works better when applied to a selection than when applied to an entire image.
To sharpen video capture images
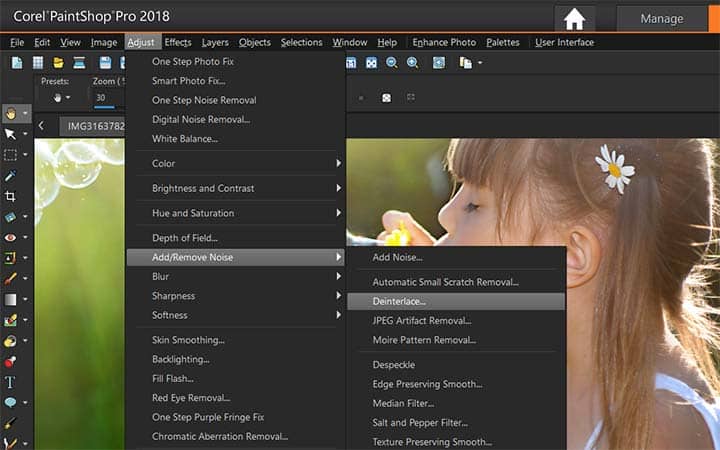
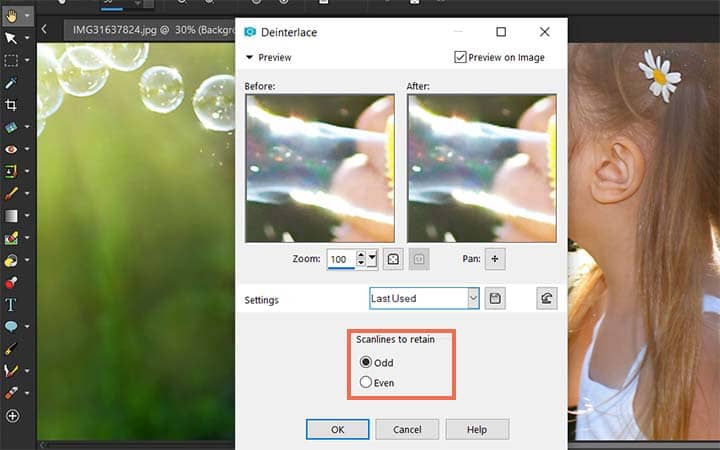
2. Select Deinterlace
Choose Adjust > Add/Remove Noise > Deinterlace. The Deinterlace dialog box appears.
3. Adjust position
In either the Before or After pane at the top of the dialog box, drag to pan to the image area where the scan lines are most apparent.
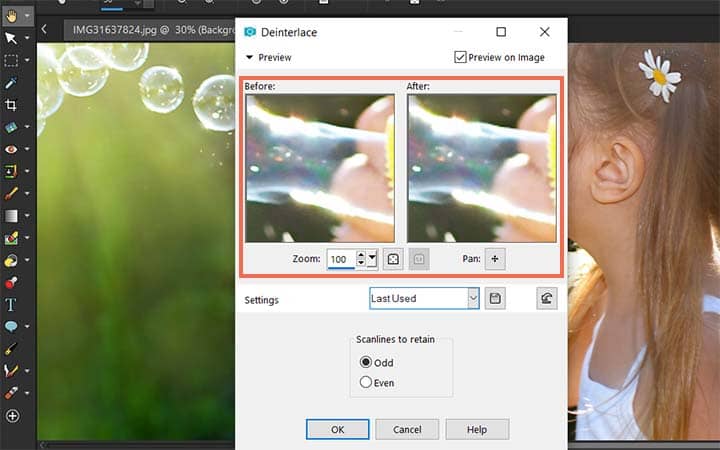
4. Pick scan lines
In the Scanlines to retain group box, choose an option that specifies whether to retain the odd-numbered or even-numbered scan lines. Click OK.
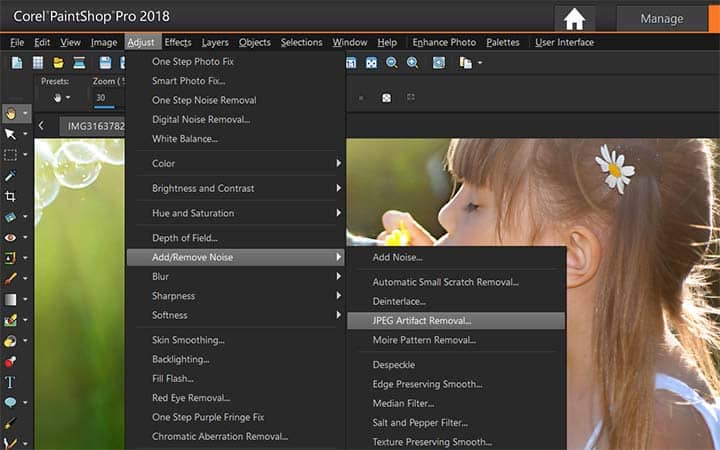
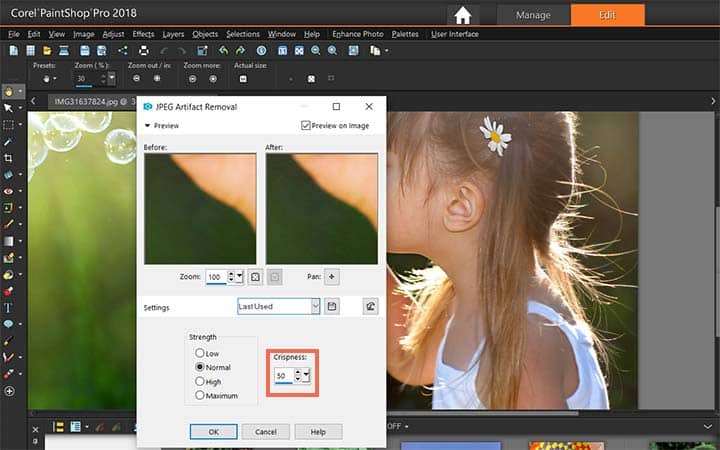
To remove artifacts from JPEG images
2. Select JPEG Artifact Removal
Choose Adjust > Add/Remove Noise > JPEG Artifact Removal. The JPEG Artifact Removal dialog box appears.
3. Adjust position
In either the Before pane or the After pane at the top of the dialog box, drag to pan to the image area where the scan lines are most apparent.
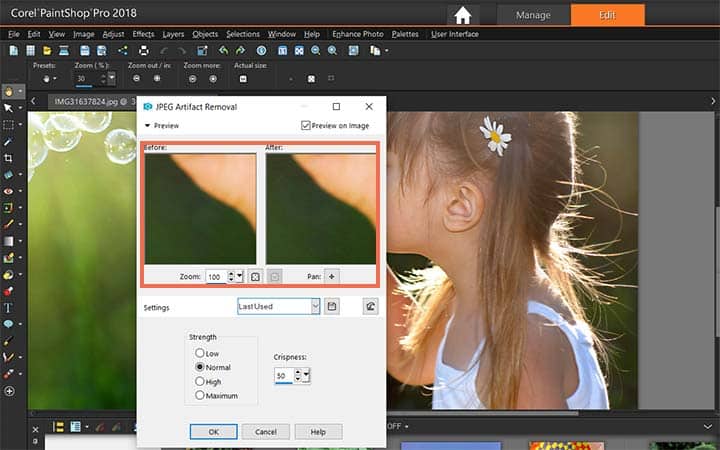
4. Set Strength
In the Strength group box, choose an option to determine the strength of correction. Note: For best results, try each option, and examine all areas of the image, to see which one works best.
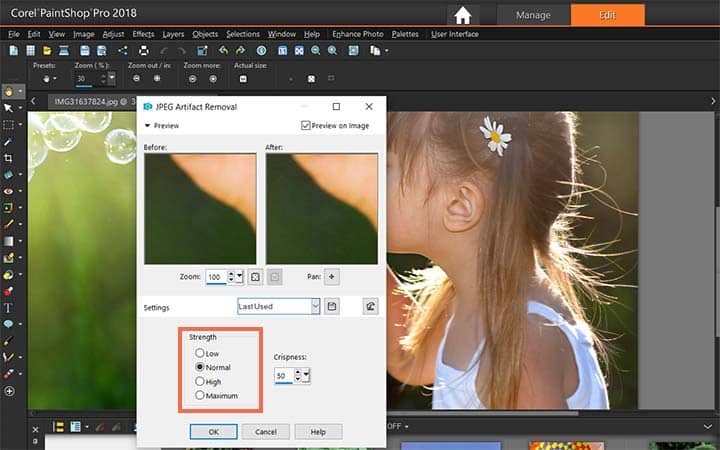
4. Set Crispness
Type or set a value in the Crispness control to specify the amount of detail to restore. Values range from 0 (the least) to 100 (the most). Note : Excessive crispness may produce fine dots in the image. Click OK.
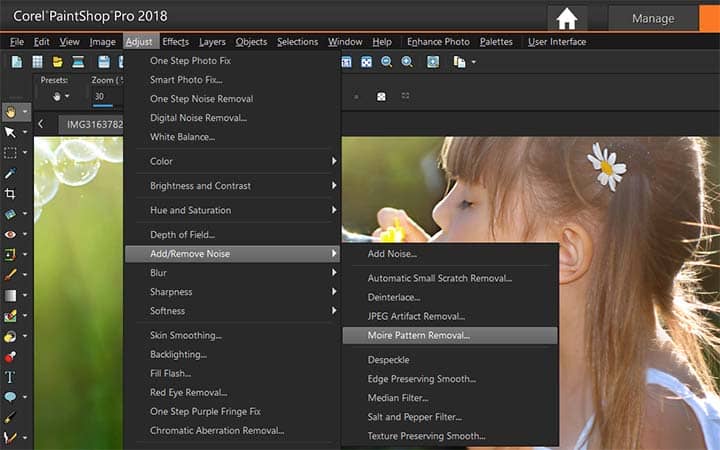
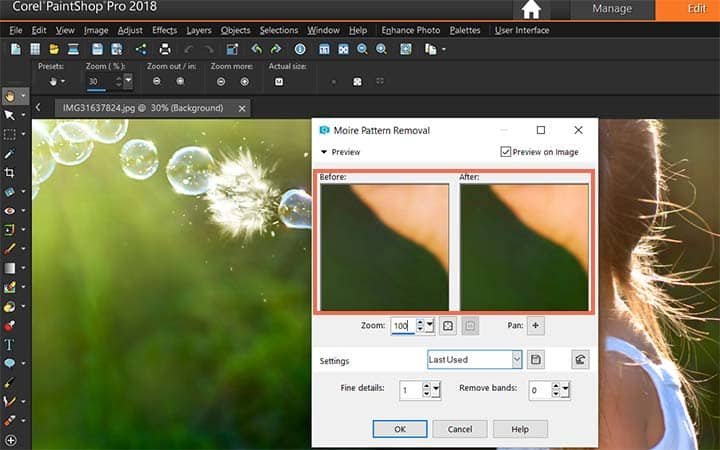
To remove more patterns
2. Select Moire Pattern Removal
Choose Adjust > Add/Remove Noise > Moire Pattern Removal. The Moire Pattern Removal dialog box appears.
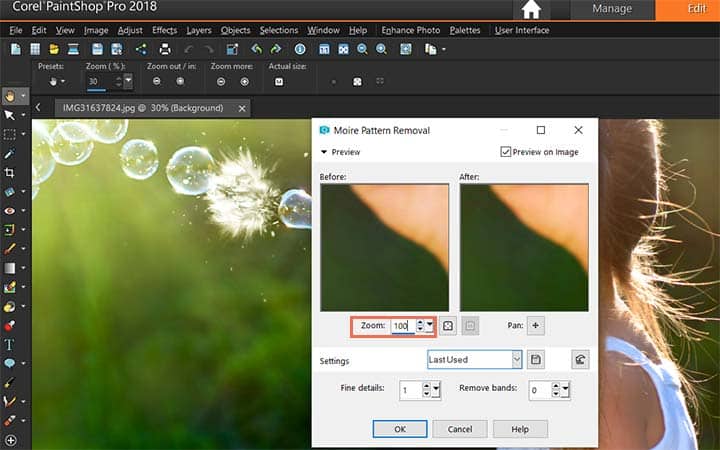
3. Set zoom level
Type or set a value in the Zoom control to magnify the image until you can see the fine patterns clearly.
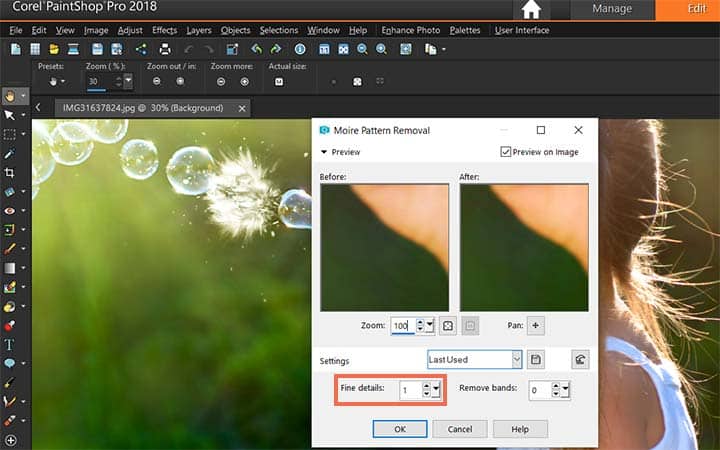
4. Adjust Fine details
Type or set a value in the Fine details control to set the level of pattern removal. Change the value one number at a time until the pattern disappears. Higher values may blur the image, so use the lowest value that removes the pattern.
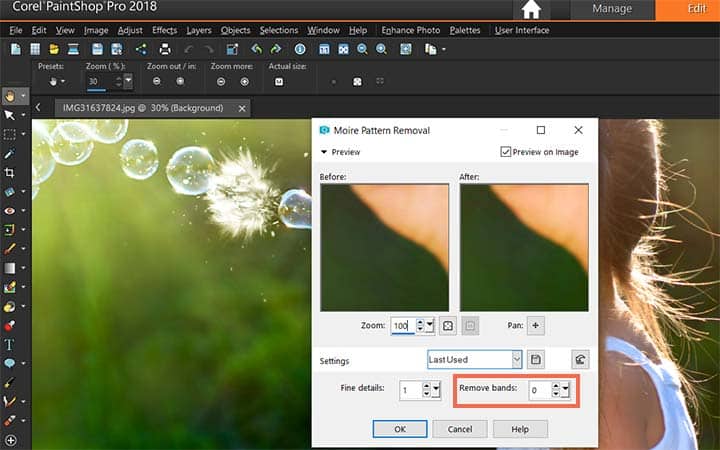
5. Adjust image magnification
Use the zoom control in the dialog box to reduce the image magnification until you can see bands or color blotches clearly in the After pane. Note: Although bands or blotches may be visible when the image is displayed at a setting of 100%, they may be easier to see at lower settings.
6. Modify Remove bands
Change the value one number at a time in the Remove bands control until any color bands or blotches become less visible (they may not disappear completely). To avoid desaturation of small objects, use the lowest value possible.
Click OK.
After you have removed the moire pattern, you may be able to use the Sharpness commands in the Adjust menu to restore detail and remove blurriness without reintroducing the pattern. The Sharpness commands work best when you choose a Fine details setting in the Moire Pattern Removal dialog box that is slightly higher than needed to remove the pattern.
To remove single-pixel specks
2. Make Selection
Select the area in the photo that contains the specks.
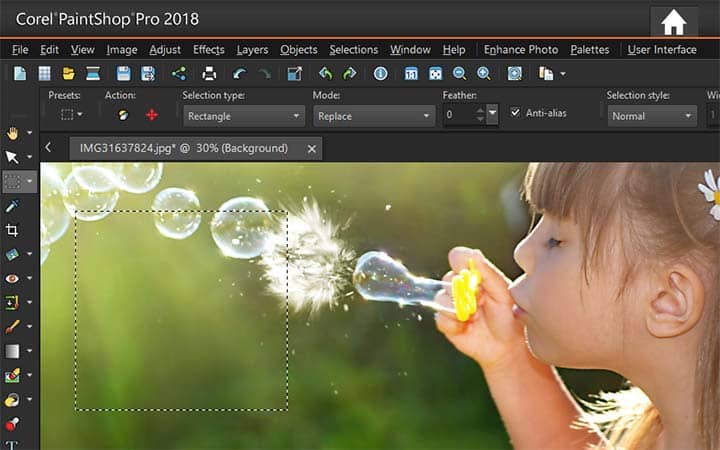
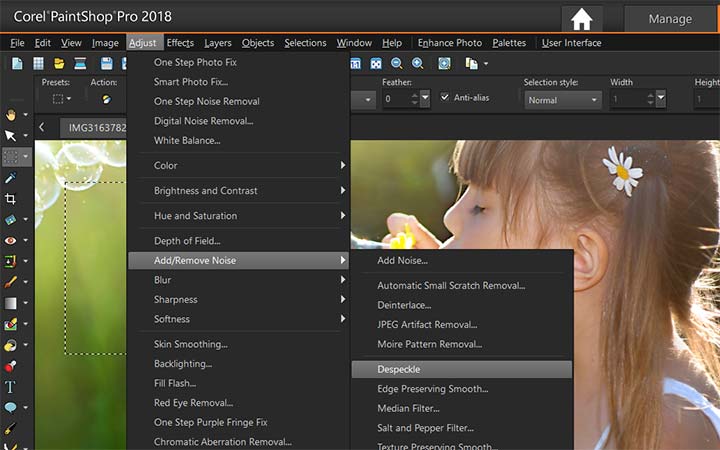
3. Apply Despeckle
Choose Adjust > Add/Remove Noise > Despeckle. The selection is despeckled.
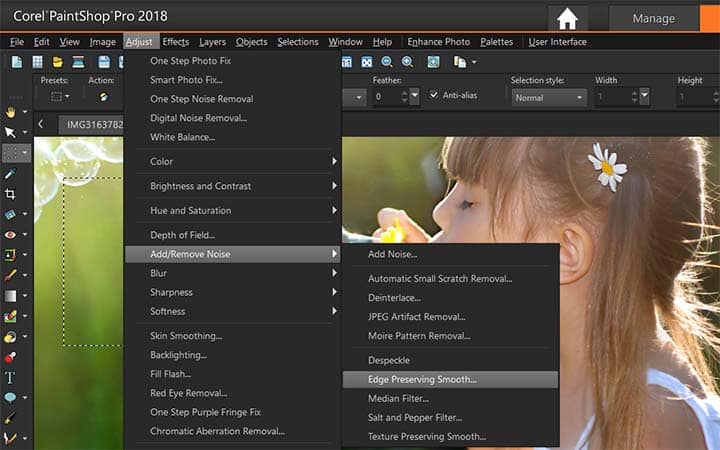
To remove noise while preserving edges
2. Select desired area
Select the area that contains the noise you want to remove.

3. Apply Edge Preserving Smooth tool
Choose Adjust > Add/Remove Noise > Edge Preserving Smooth. The Edge Preserving Smooth dialog box appears.
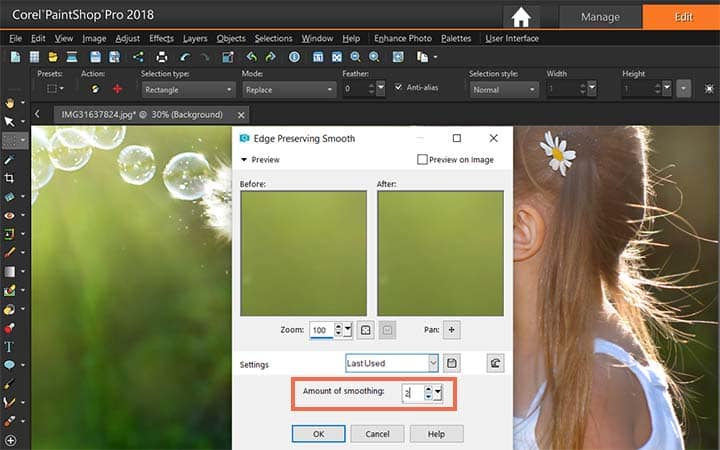
4. Set Amount of smoothing
Type or set a value in the Amount of smoothing control. Choose the smallest amount of smoothing that removes the specks while retaining image detail. You cannot enter a value lower than 1. Click OK.
Although you can apply the Edge Preserving Smooth command to the entire image, the command works best when you select the problem area.
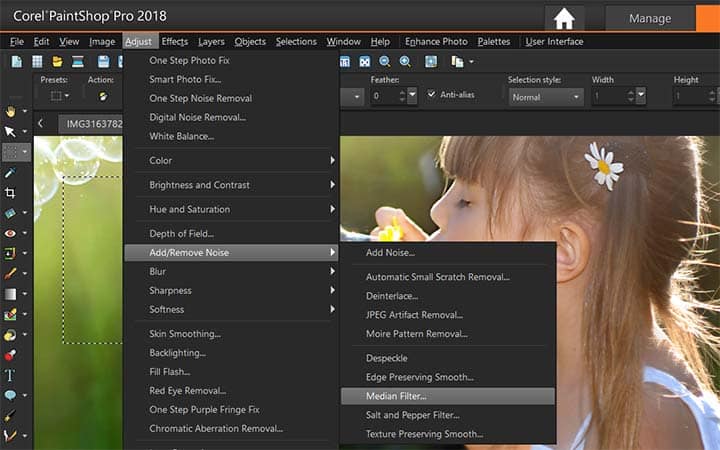
To remove distinct areas of noise
2. Make selection
Select the area that contains the noise you want to remove.

3. Apply Median Filter
Choose Adjust > Add/Remove Noise > Median Filter. The Median Filter dialog box appears.
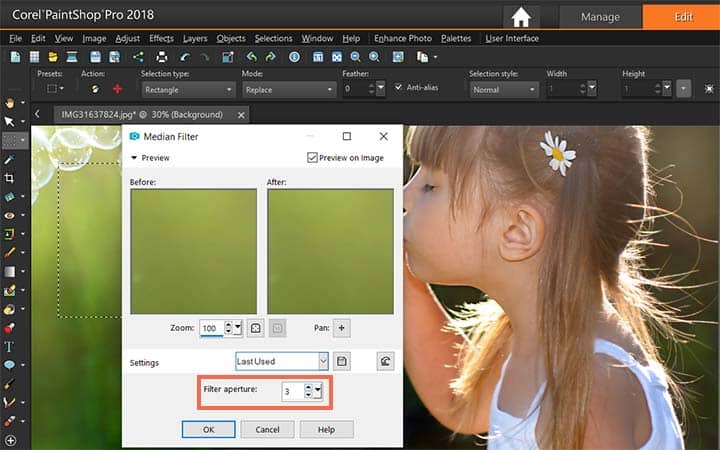
4. Adjust Filter Aperture
Type or set a value in the Filter Aperture control to choose the number of surrounding pixels to include in determining the median pixel intensity. Values range from 3 to 31 in odd-numbered increments. Note: To preserve image details, choose the smallest filter that removes the noise. For single-pixel colored specks, set the filter to 3. Click OK.
Although you can apply the Median Filter command to the entire image, the command works best when you select the problem area.
To remove multipixel specs
2. Make selection
Select the area that contains the specks.

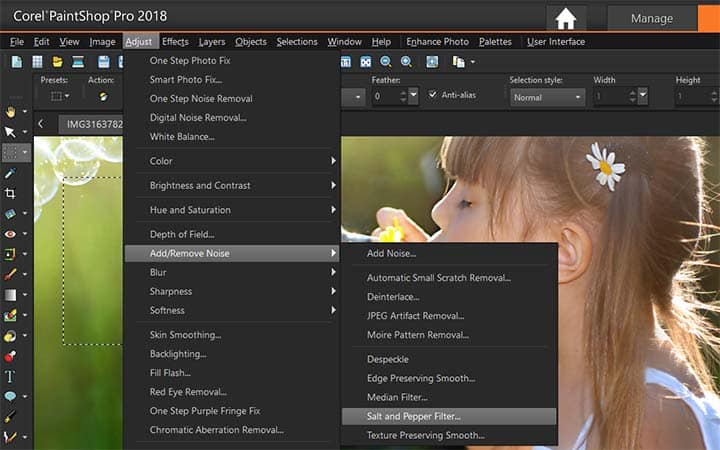
3. Apply Salt and Pepper Filter
Choose Adjust > Add/Remove Noise > Salt and Pepper Filter. The Salt and Pepper Filter dialog box appears.
4. Adjust Speck size
Type or set a value in the Speck size control to set the minimum size, in pixels, of the largest speck that can be completely removed. The value is always an odd number.
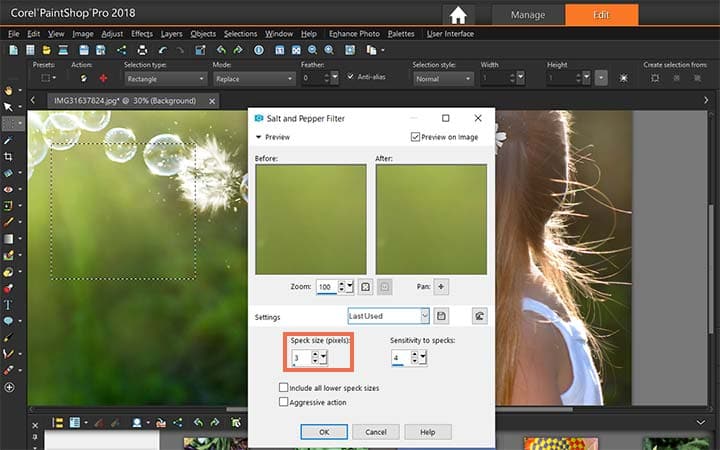
5. Specify Sensitivity to specks
Type or set a value in the Sensitivity to specks control to set how different an area must be from its surrounding pixels to be considered a speck. Click OK.
Although you can apply the Pepper Filter command to the entire image, the command works best when you select the problem area. You can remove all specks that are smaller than the Speck size value by marking the Include all lower speck sizes check box. You can intensify the strength of the correction by marking the Aggressive action check box.

To remove noise while preserving textures
2. Make selection
Select the area that contains the noise you want to remove.

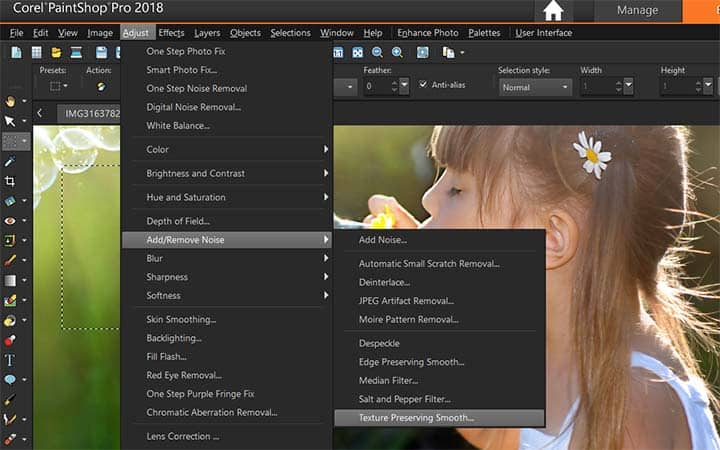
3. Apply Texture Preserving Smooth tool
Choose Adjust > Add/ Remove Noise > Texture Preserving Smooth. The Texture Preserving Smooth dialog box appears.
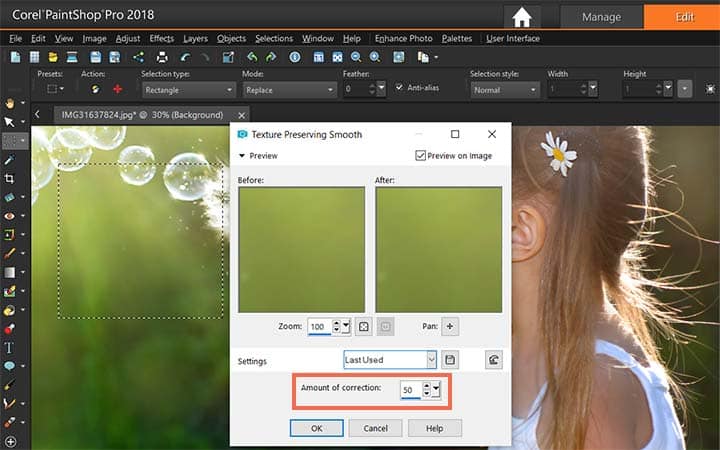
4. Adjust Amount of correction
Type or set a value in the Amount of correction control to set a value for the strength of the correction. At lower values, a small amount of noise is removed, but textured areas are preserved. At higher values, more noise is removed, but textured areas may not be fully preserved. Click OK.
Download a free trial now and start removing image noise today
PaintShop Pro's image editing tools allow you to quickly and easily remove image noise creating a cleaner crisper image.
PaintShop Pro does more than just remove image noise
Check out some of the other photo editing features in Paintshop Pro, like fix underexposed images, fix overexposed images, fix lens distortion, and more! Create high quality photos in a fun and easy to use photo editor and make your photos stand out more than ever.
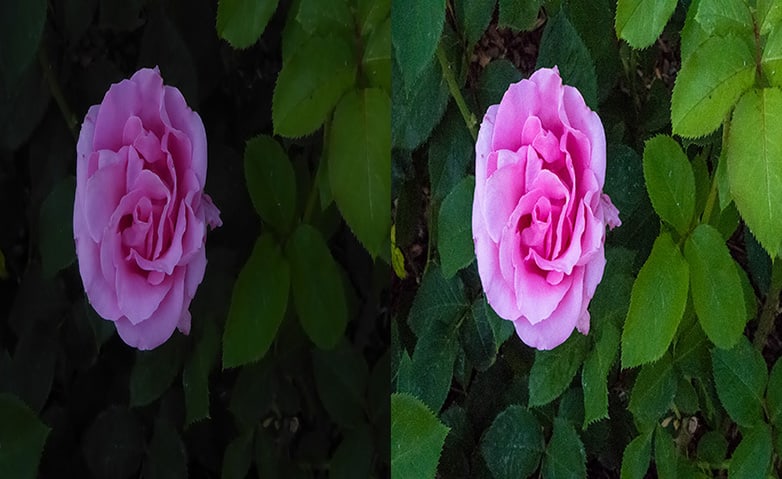 Fix Underexposed Photos
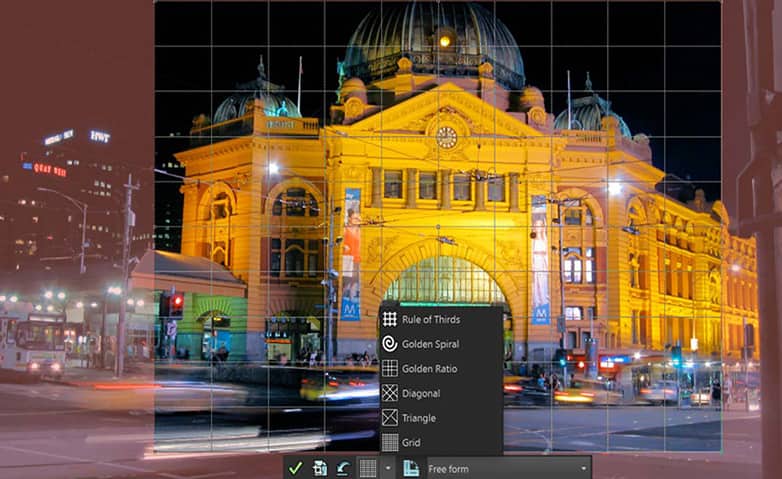 Correct Perspective Distortion
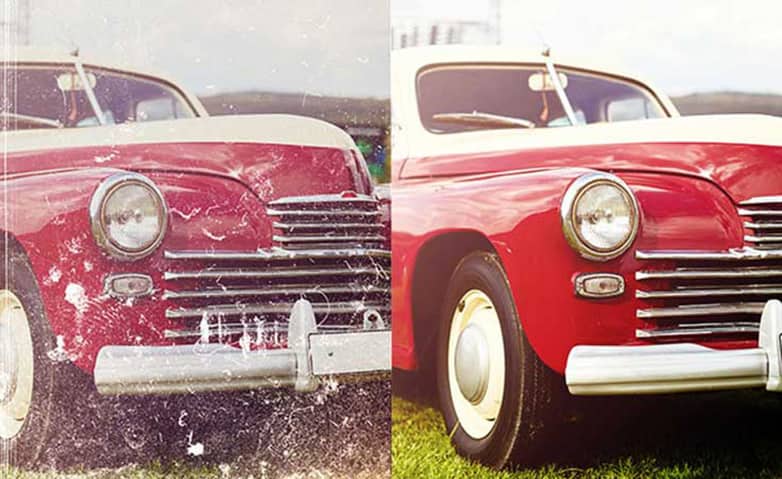 Restore Photos
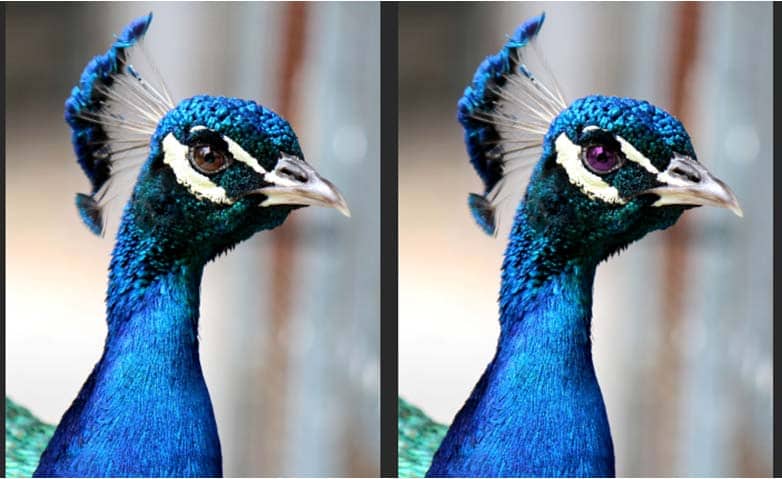 Change The Color Of An Image
Download the best solution for removing noise from photos that there is
Do your images have a lot of noise in them. We promise you’ll love the easy-to-use photo noise remover features in PaintShop Pro. Click below to download your free 30-day trial and remove noise from photos for free before you buy!