How To Create A Tilt Shift Lens Effect
Create a great finish to your images by using the tilt-shift effect. The effect allows you to focus attention on your subject while adding a blur effect to your background. The resulting image is pleasingly focused yet soft. Take advantage of the reality-shifting effects of PaintShop Pro and learn how to create a tilt-shift lens effects.
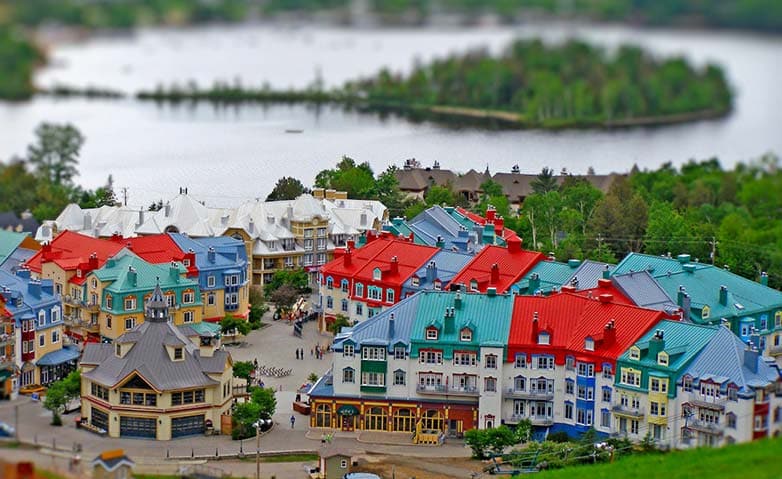
You can create a quick miniature effect (also known as a tilt-shift effect) so that the scene in a photo resembles a miniature model or toy. The illusion is created by adjusting the depth of field, usually across a specified horizon line, and increasing the saturation of the photo.
1. Install PaintShop Pro
To install PaintShop Pro photo editing software on your PC, download and run the installation file above. Continue following on-screen instructions to complete the setup process.
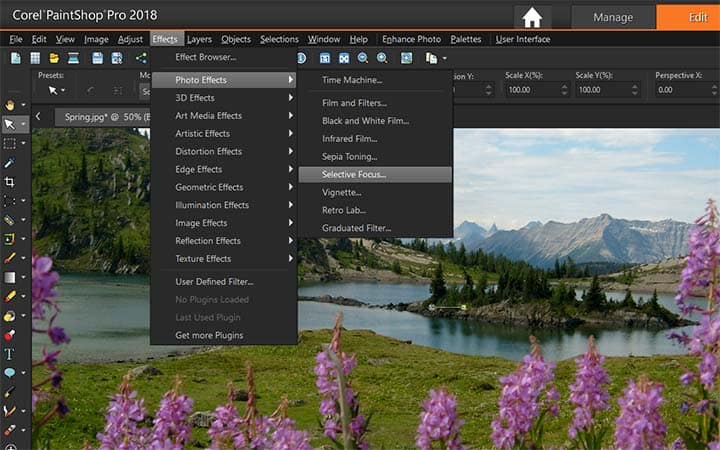
2. Select Selective Focus
Choose Effects > Photo Effects > Selective Focus. The Selective Focus dialog box appears. You can maximize the dialog box to increase the size of the Before and After panes of the preview area.
3. Pick a Selection Tool
In the Area of focus, click one of the following tools:
- Planar Selection Tool — the default tool for setting a linear area of focus. It is effective at setting an area of focus along a road, bridge, or other linear element that isn’t along the edge of your photo.
- Half Planar Selection Tool — lets you set a linear area of focus along the edge of a photo
- Radial Selection Tool — lets you set a circular area of focus.

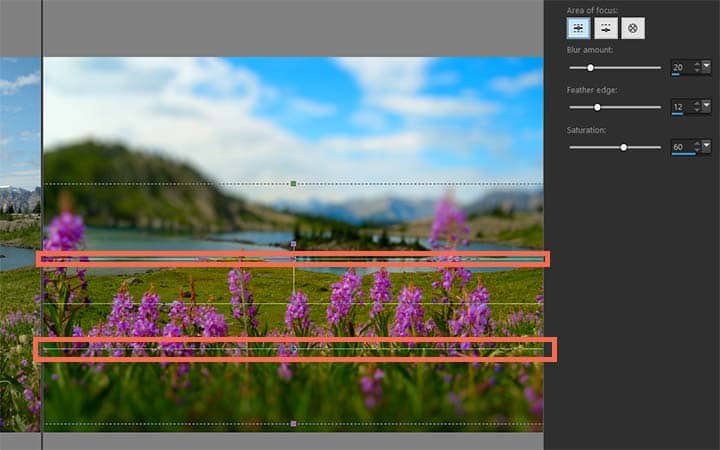
4. Adjust position
In the Before pane of the preview area, when your pointer displays the move cursor, drag the area of focus to the position you want.

5. Adjust the area of focus
Drag the rotation handle (the box at the end of the short line) to rotate the area of focus.

6. Set the edges for the area of focus
Drag a sizing handle (on the solid lines) to set the edges for the area of focus.
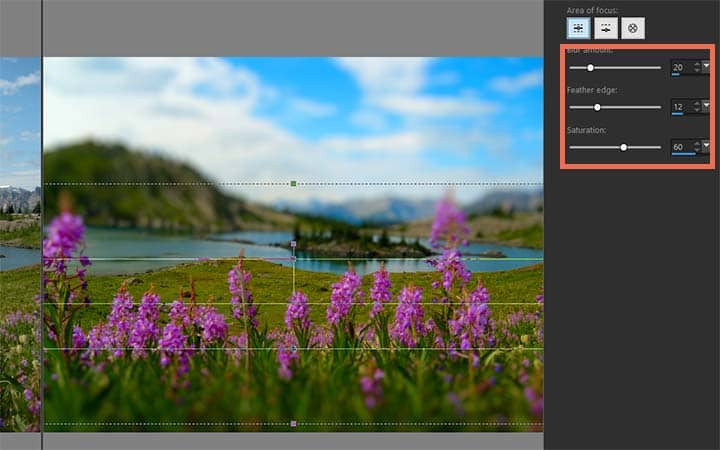
7. Fine-tune the results
Fine-tune the results by dragging any of the following sliders:
- Blur amount — determines the amount of blur outside the area of focus
- Feather edge — determines the softness of the transition between the area in focus and the blurred areas. You can also adjust feathering interactively by dragging a feathering handle (on the dotted lines) in the Before pane.
- Saturation — determines the intensity of the colors in the photo. Increasing saturation can help simulate the vivid paint colors used for models and toys.
Download a free trial now and start creating tilt shift images today
PaintShop Pro's image editing tools allow you to quickly and easily create a tilt shift images.
PaintShop Pro does more than just create a tilt shift images
Check out some of the other photo editing features in Paintshop Pro, like make vintage looking photos, add sepia effect, use photo masks, and more! Create high quality photos in a fun and easy to use photo editor and make your photos stand out more than ever.
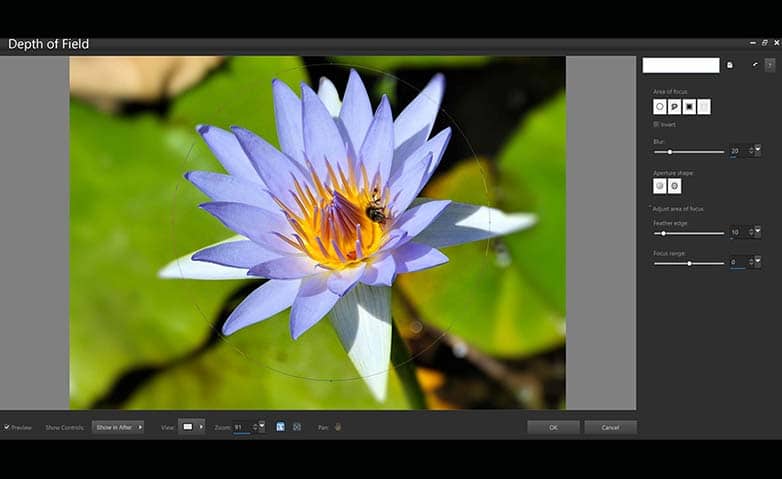 Adjust Depth Of Field
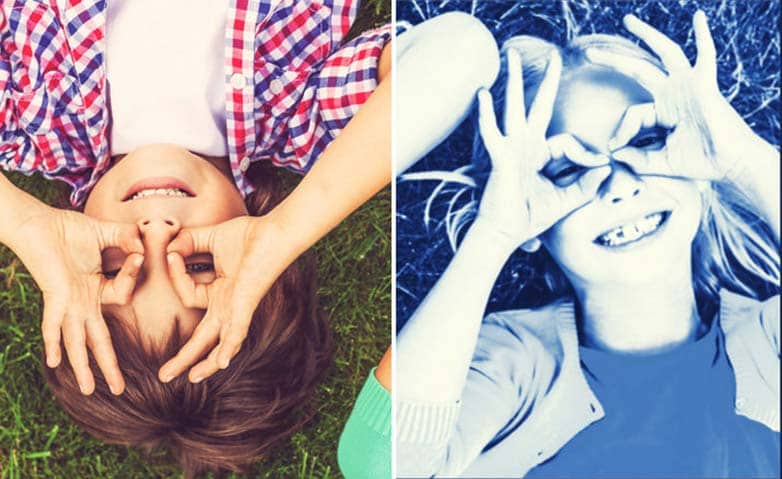 Add Fun Photo Effects
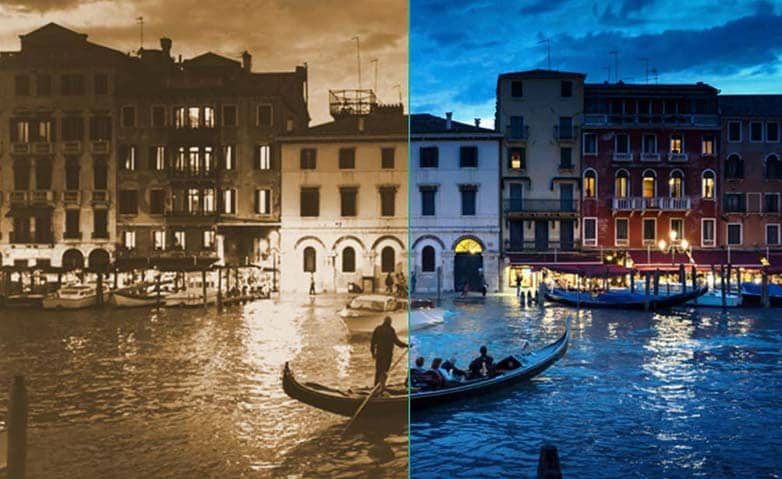 Add Cool Photo Effects
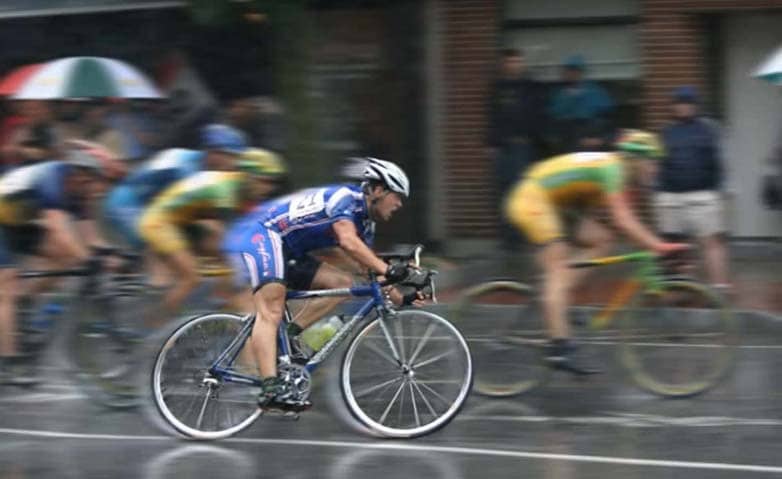 Add Motion Blur
Download the best solution for tilt shift images that there is
Wanting to create a tilt shift image? We promise you’ll love the easy-to-use tilt shift features in PaintShop Pro. Click below to download your free 30-day trial and make tilt shift photos for free before you buy!