
How To Create Pop Art
Pop art has been growing in popularity recently and draws its inspiration from the art of the 1950's to the 1970's. Characterized by bright, bold colors and iconic imagery, Pop art is a great way to express your creativity and boldness. Learn how to create pop art with PaintShop Pro and turn your images into your own take on the classic art form.
1. Install PaintShop Pro
To install PaintShop Pro photo editing software on your PC, download and run the installation file above. Continue following on-screen instructions to complete the setup process.
2. Select a photo
Drag the photo into PaintShop Pro’s Edit tab or use the command File > Open to open up the photo you wish to use for your pop art.

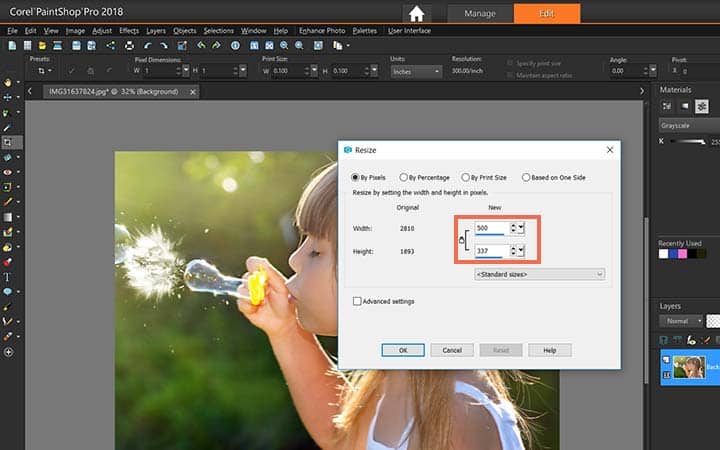
3. Resize
Shrink the size of the image if it’s large. Access the resize tool from Image > Resize and choose a new width or height, the rest of the value will adjust automatically to avoid distortion. Copy (Ctrl+C) the image. Also, you can do it by going to Edit > Copy.
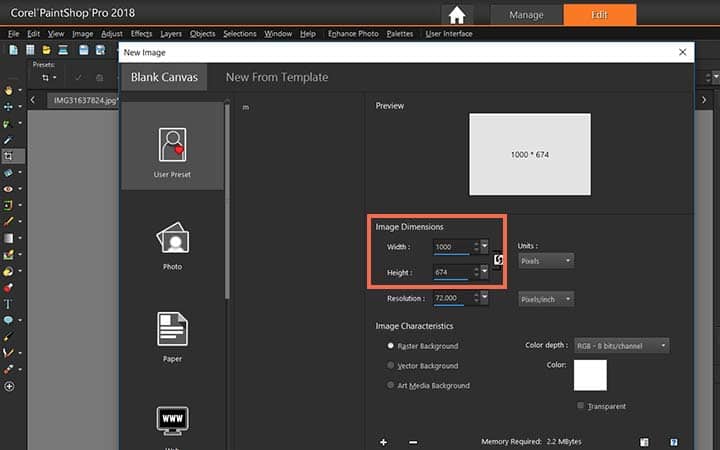
4. Make a new blank canvas
Choose File > New to open a New Image dialog box. In the Image Dimension section, Double the values of width and height of the resized image (or, the actual image if you didn’t resized). Then, Click OK.
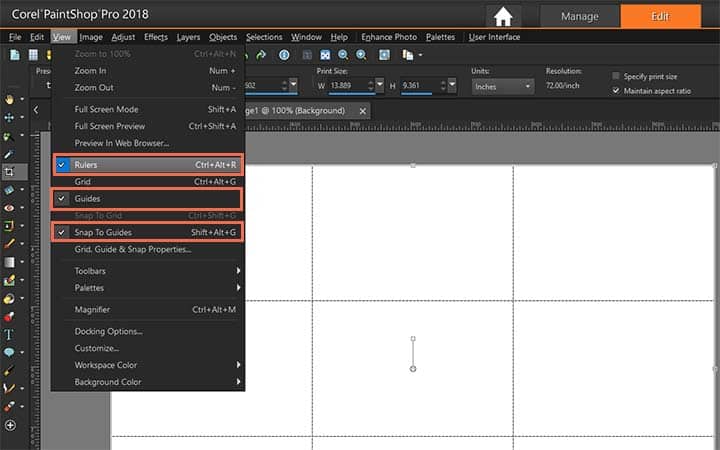
5. Apply rulers and guides
Go to View menu and pick Rulers. Again, go back to the View menu and pick Guides. Ensure that Snap to Guides is active in the View menu as well. Hover the cursor over the ruler that now shows on the left hand side of your working region. Drag a guide onto the canvas and let go of the guide when it is aligned with the utmost width of the canvas, indicated on the horizontal ruler across the top of the working region. If you drop the guide in the wrong place, you can move it again by grabbing it from over the horizontal ruler where the guideline looks relatively thicker. Repeat the exact steps to drag another vertical guide onto the canvas, but this time, place it at the minimum width. From the horizontal ruler at the top of your working region, drag guides that line up to maximum and minimum heights on the vertical ruler.
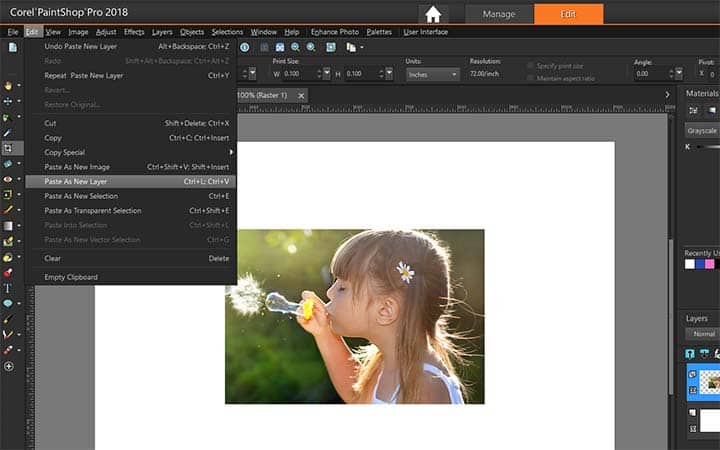
6. Paste the chosen image onto your canvas
Paste (Ctrl+V) the image you copied in step 3 onto your blank canvas. Alternatively, it can be done by going to Edit > Paste As New Layer.
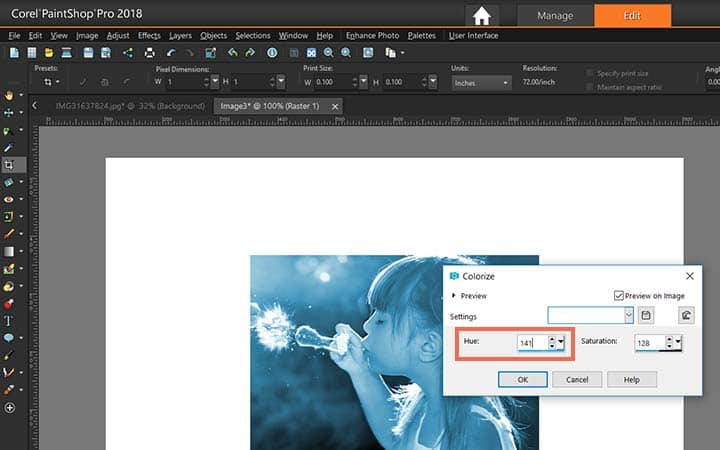
7. Adjust the color
Select the image layer in your Layers palette and apply Adjust > Hue and Saturation > Colorize. Change the Hue control up and down to get the desired hue.
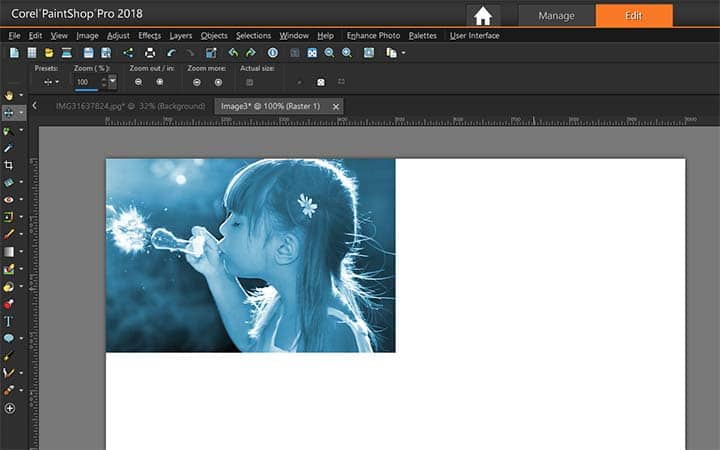
8. Adjust the position of the image
Choose the Move tool from the Tools toolbar. Use the guides you set up in step 5 and drag the image in the upper left quadrant of your working region.
9. Repeat steps 6-8 three more times
Repeat the last three steps, three more times with different small tweaks. Every time you repeat step 7, make sure to select a different hue. For step 8, Drag the image in a new quadrant each time.

Download a free trial now and start creating pop art today
PaintShop Pro's image editing tools allow you to quickly and easily to create pop art images to show of to friends and family.
PaintShop Pro does more than just to create pop art images
Check out some of the other photo editing features in Paintshop Pro, like make a meme, use photo templates, add sepia effect, and more! Create high quality photos in a fun and easy to use photo editor and make your photos stand out more than ever.
 Make A Meme
 Make A Quote Picture
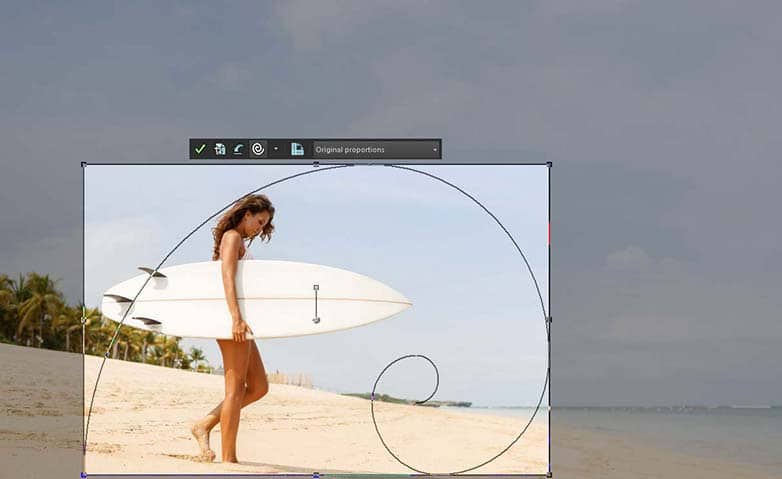 Use The Golden Ratio
 Use Photo Templates
Download the best solution for making pop art that there is
Wanting to turn your image into pop art? We promise you’ll love the easy-to-use features in PaintShop Pro for making pop art images. Click below to download your free 30-day trial and create pop art for free before you buy!