
How To Blend Photos
Utilizing layer masks to merge two images is easier than ever with Paintshop Pro. However, to combine multiple photos that don't have the same lighting or color qualities, you can use image blending to create a seamless transition between the images in your composition. This process starts by layering your images and adjusting the opacity of the picture to create a smooth transition. Keep reading to learn how to blend photos of your own.
Photo Blend lets you combine two or more photos of the same scene and choose exactly what you want to keep or remove from the scene. Here are some examples:
- Remove moving objects, such as people or cars, from a photo — you can create an empty street in a busy city.
- Fix a group shot in which one person blinks or looks away — simply swap in a better pose from another photo.
- Get creative by showing the same person multiple times in a single photo.
1. Install PaintShop Pro
To install PaintShop Pro photo editing software on your PC, download and run the installation file above. Continue following on-screen instructions to complete the setup process.
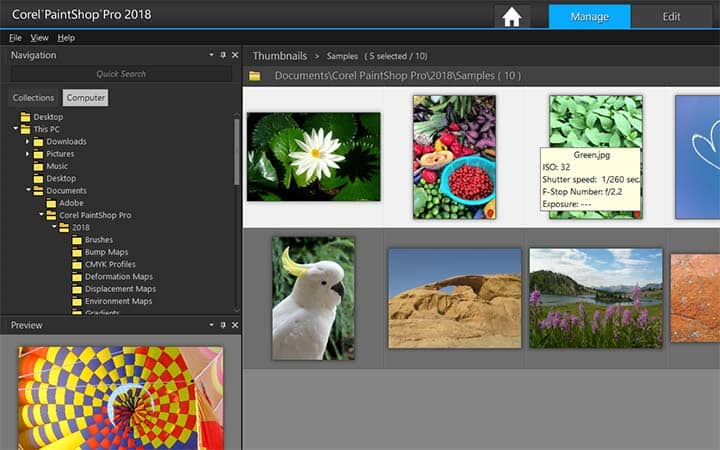
2. Select photos
Click the Manage tab, and select the set of photos that you want to blend.
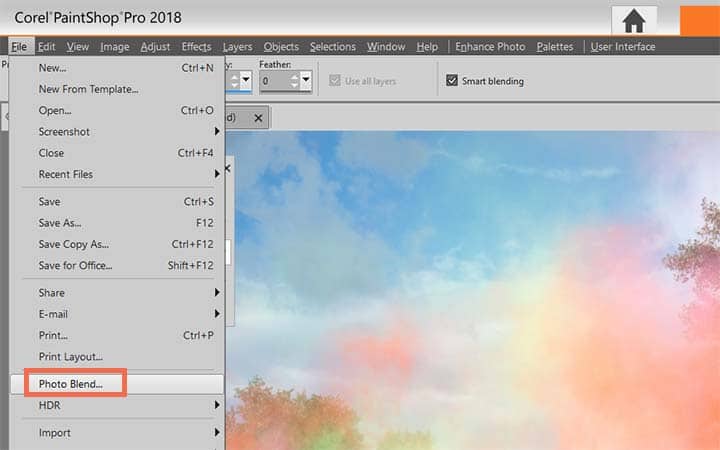
3. Choose Photo Blend
Click File > Photo Blend.
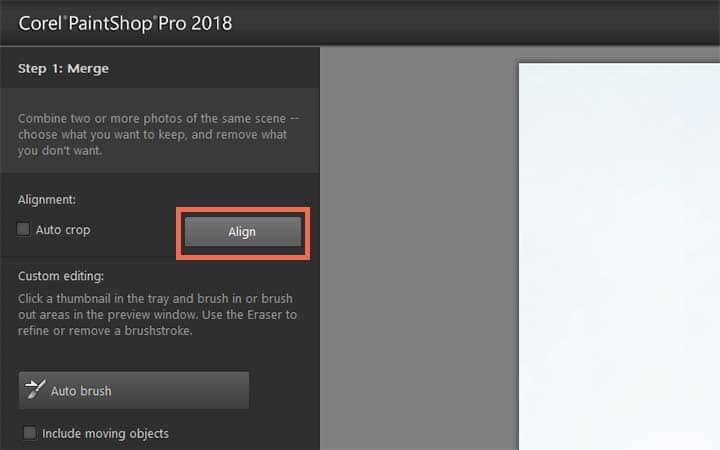
4. Make alignment
In the Alignment area, click Align. To see the results, enable the Preview Alignment check box (near the bottom of the panel). If you want to crop unaligned edges along the borders of the photos, mark Auto crop.
5. Select a thumbnail
Click a thumbnail in the tray. The corresponding photo displays in the preview area.
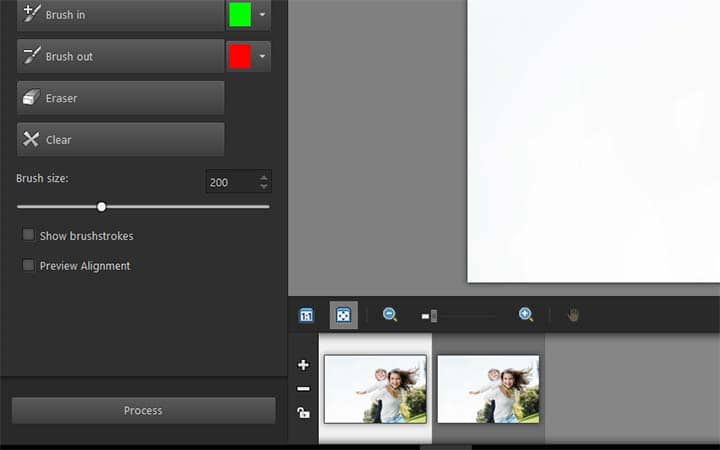
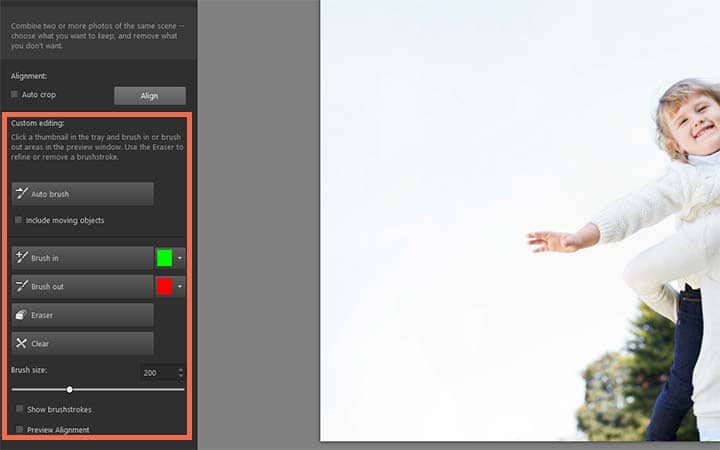
6. Custom edit
In the Custom editing area, do any of the following:
- Click Brush in, and in the preview area, drag over the area that you want to preserve. You don't need to be exact.
- Click Brush out, and in the preview area, drag over the area that you want to remove.
- Click Auto brush if you want the application to auto-detect the differences between the images. Leave the brush marks as they are to remove ghosting and other differences, or use it as a starting point for custom brushstrokes.
- Enable the Include moving objects check box, and click Auto brush to auto-detect and preserve the differences between photos (for example, if you want to create a multi-pose image).
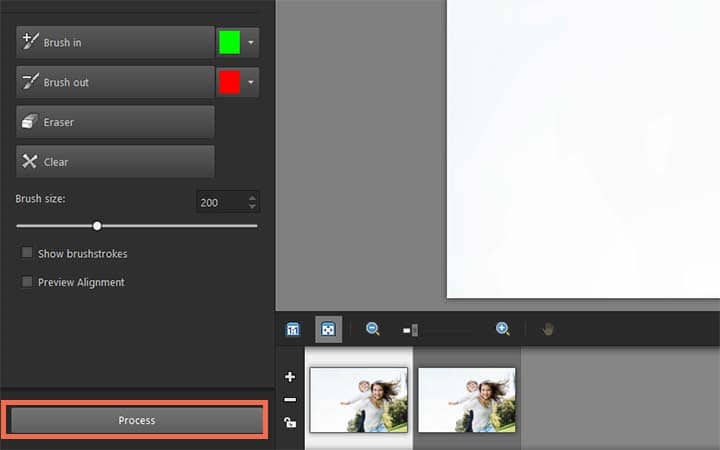
7. Repeat step 4-5
Repeat the editing process for other photos by clicking thumbnails in the tray and applying brushstrokes.
8. Click Process
Review the results in the preview area. If you want to adjust your settings or continue editing, click Back.
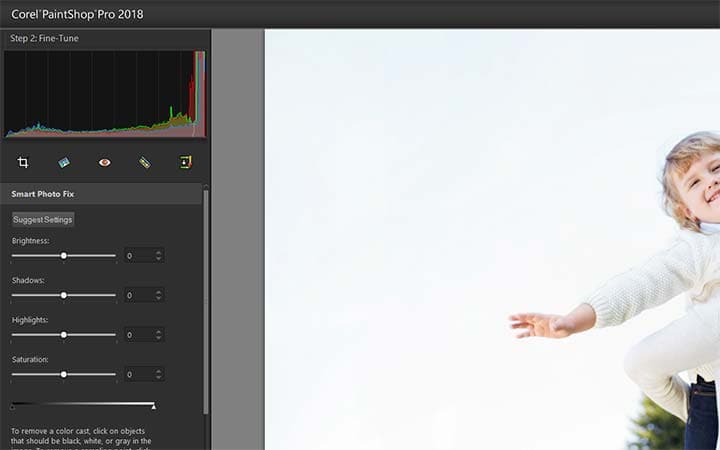
9. Make adjustments
In the Step 2: Fine-Tune window, use any of the tools or adjustment controls to fine-tune the image. For more information, see Using Adjust.
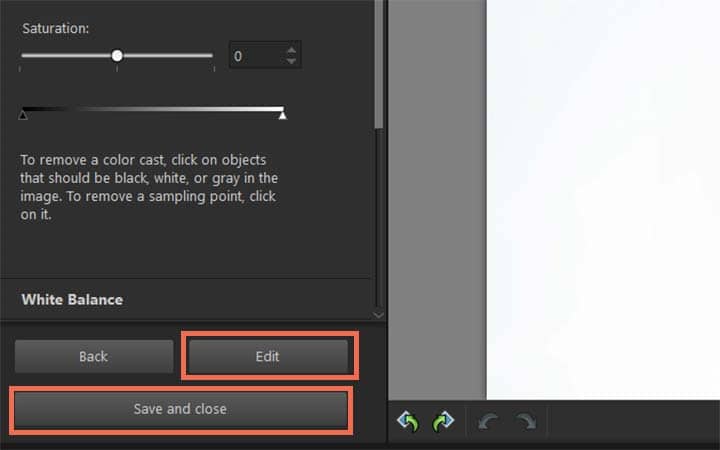
10. Finish
Do one of the following:
- Click Edit to continue editing the photo. The Photo Blend window remains open.
- Click Save and close to save the file, close the Phot Blend window, and return to the workspace.
Download a free trial now and start blending photos today
PaintShop Pro's image editing tools allow you to quickly and easily blend photos to create some cool image combinations.
PaintShop Pro does more than just blend photos
Check out some of the other photo editing features in Paintshop Pro, like photo joiner, remove red eye, remove objects from a photo, and more! Create high quality photos in a fun and easy to use photo editor and make your photos stand out more than ever.
 Merge Photos
 Do Double Exposure
 Remove Blemishes In Photos
 Add Text To Photos
Download the best solution for blending images that there is
Wanting to blend some photos together for fun? We promise you’ll love the easy-to-use image blending features in PaintShop Pro. Click below to download your free 30-day trial and blend photos for free before you buy!