How To Do Double Exposure
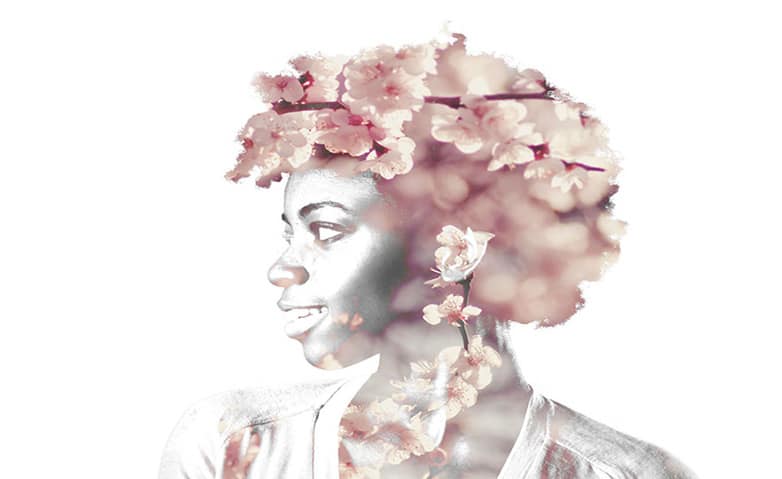
Have you seen the excellent effect where two photographs are superimposed over each other seamlessly? That's a double exposure effect, and it's a fantastic way to spice up a composition. In the past, you had to perform wizardry and capture two images with the same film exposure. Now, you just need PaintShop Pro learn how to do double exposure and create magical compositions.
1. Install PaintShop Pro
To install PaintShop Pro photo editing software on your PC, download and run the installation file above. Continue following on-screen instructions to complete the setup process.
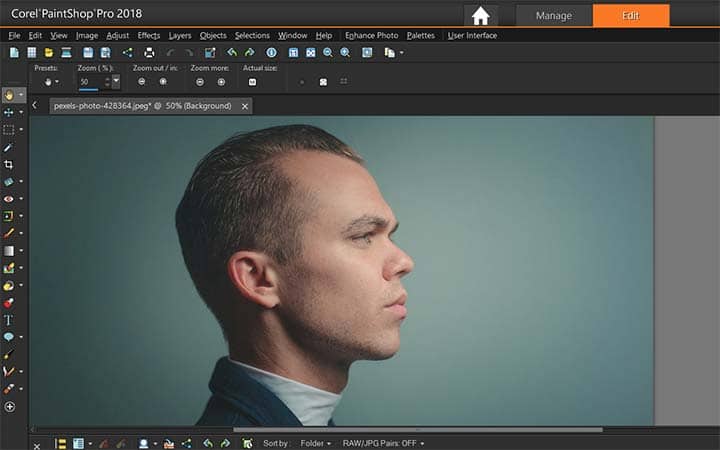
2. Open your main image in Edit tab
It’s easiest if you choose an image with little noise in the background. A portrait of a person on a solid background is a great example.
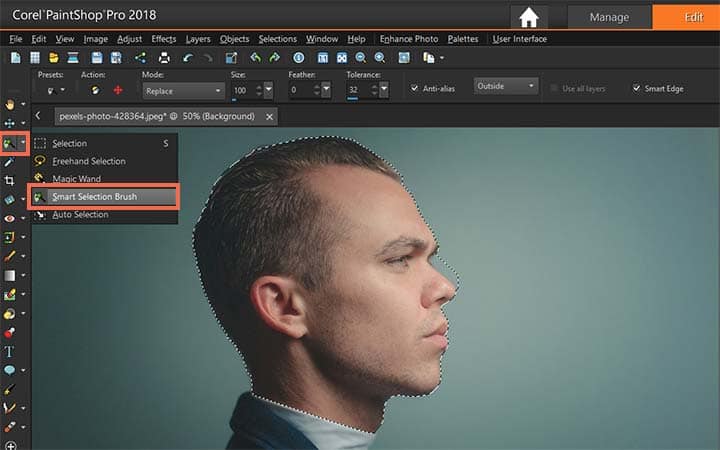
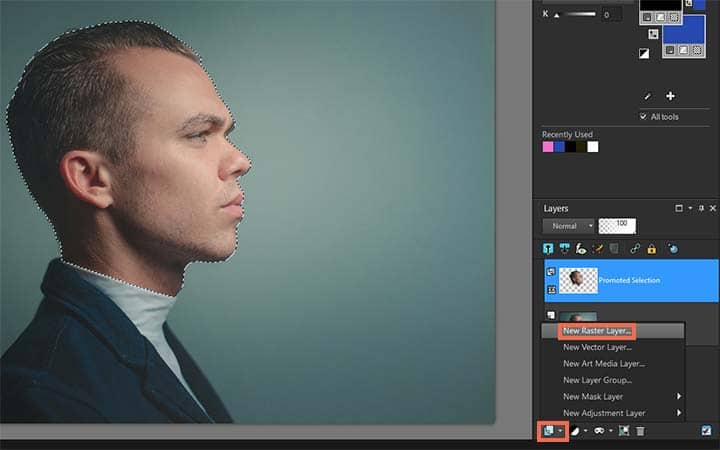
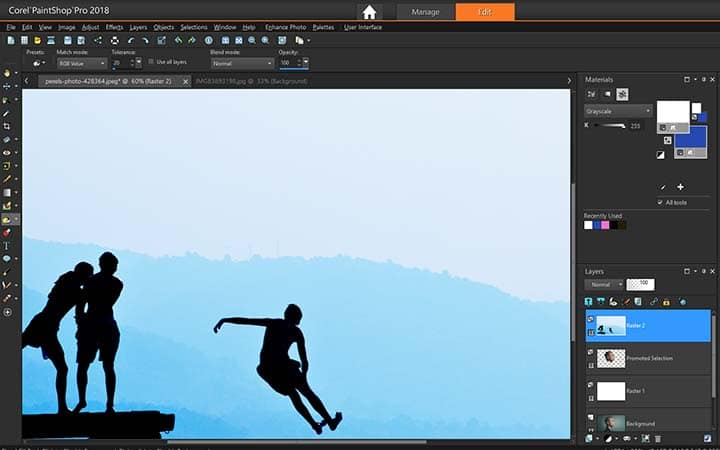
3. Choose the subject
On your Tools toolbar, select the Smart Selection Brush from the selection tools. Keep the Mode on your Tool Options palette as Add (Shift). Select the subject of your image by directly clicking on it. If necessary, click and drag to add to your selection. Also, It’s possible to exclude from the selection by setting the Mode to Remove (Ctrl).
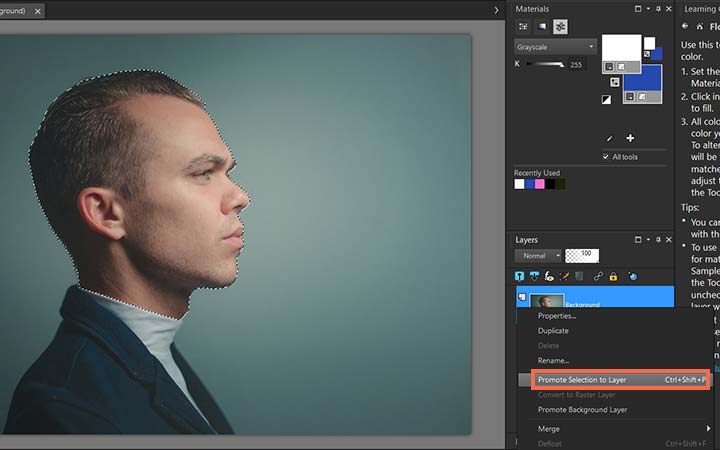
4. Promote selected subject to a new layer
Right-click on the background layer in the Layers palette. Then, select Promote Selection to Layer. After that, deselect the subject with Ctrl+D.
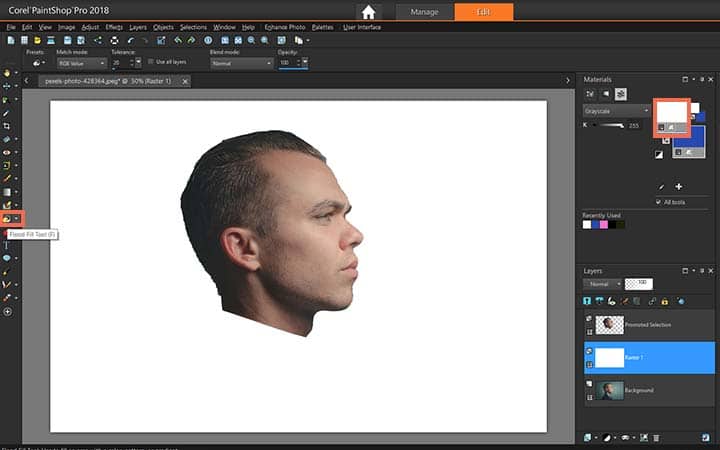
5. Add a new white layer underneath the promoted layer
5.1. Add a Raster Layer
Click on the New Layer icon drop list in the Layers palette and select New Raster Layer. A dialog box will appear, click ok.
5.2. Modify the layer
Drag the new layer underneath the promoted layer and above your background layer. Select the Flood Fill tool from the Tools toolbar. Make Sure that the Foreground and Stroke Properties is set to white in your Materials palette, and then click on your new layer to fill with white.
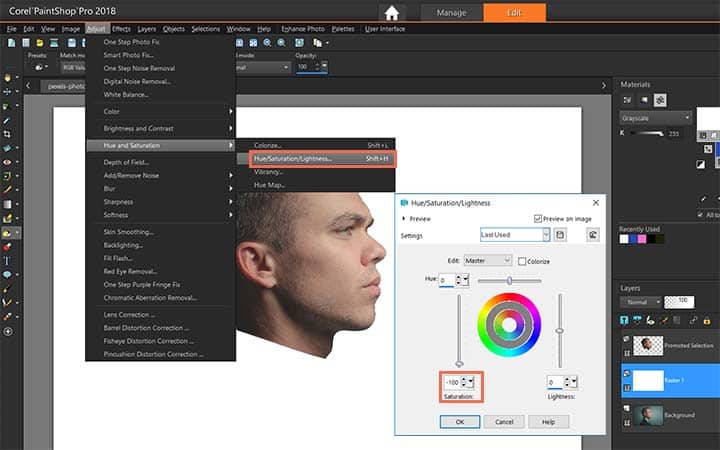
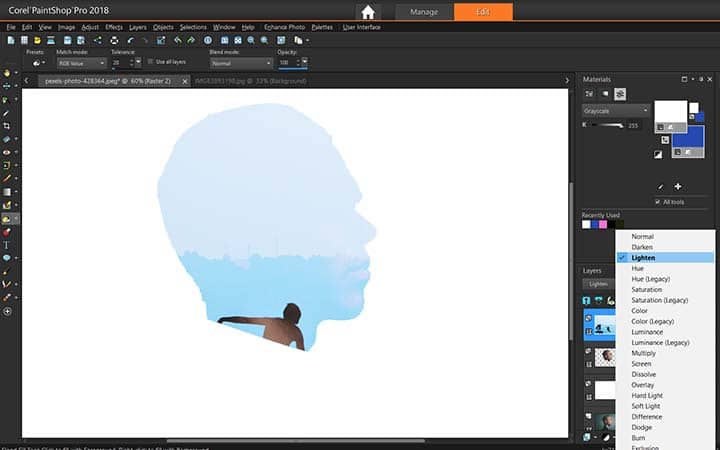
6. Desaturate the obtained subject
Remain on your Promoted Selection layer and choose Adjust > Hue and Saturation > Hue/Saturation/Lightness. Change the saturation slider to -100.
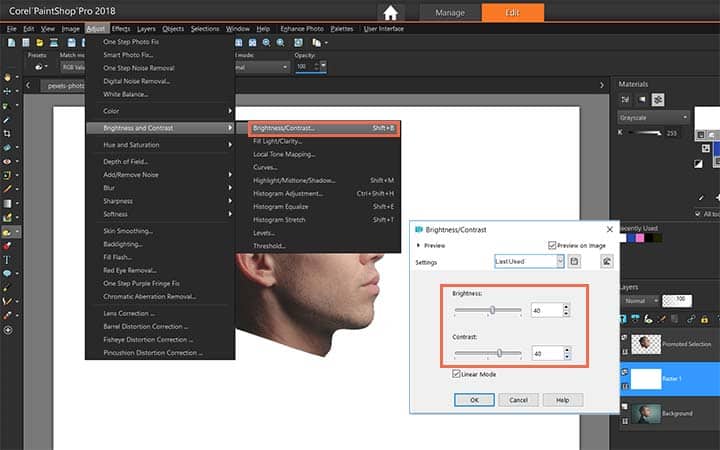
7. Modify the brightness/contrast
Choose Adjust > Brightness and Contrast > Brightness/Contrast and turn your brightness and contrast sliders up slightly. The double exposure effect will be visible mostly in dark portions of the image. For that, you’ll have to modify the settings depending on the actual image.
8. Copy and paste the image you wish to blend
Open the image you wish to blend with the subject. Copy (Ctrl C) the image and move back to the original project. Then, paste (Ctrl V) the image on top of the Promoted Selection layer.
9. Select the blend mode to Lighten
At the top of your Layers palette, select Lighten from the drop list of blend modes. Position the top image if you feel for a better composition. That’s it – you’re all done! After the double exposure is completed, you can always go back and change the Brightness and Contrast to expose more of either image, until you are satisfied.
Download a free trial now and start using double exposure today
PaintShop Pro's image editing tools allow you to quickly and easily use double exposure to create some neat images.
PaintShop Pro does more than just double exposure images
Check out some of the other photo editing features in Paintshop Pro, like remove red eye, edit photo layers, add text to photos, and more! Create high quality photos in a fun and easy to use photo editor and make your photos stand out more than ever.
 Use Layers
 Remove Blemishes In Photos
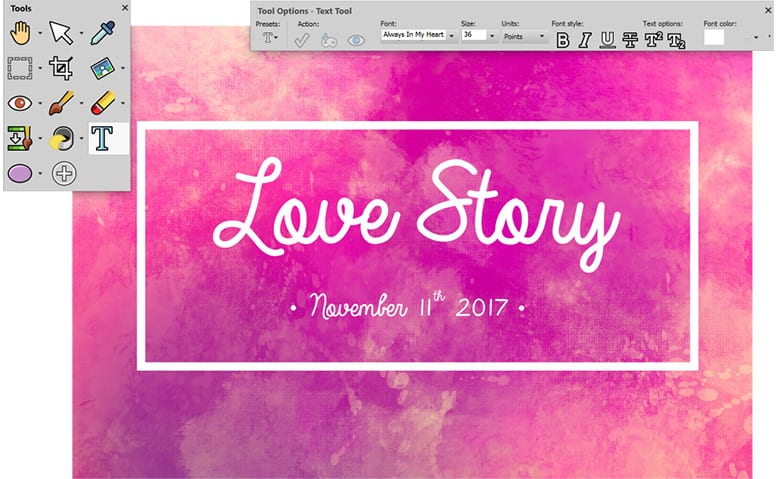 Add Text To Photos
 Use Photo Makeover Tools
Download the best solution for double exposure images that there is
Do you have a few images that you want to combine into a double exposure image. We promise you’ll love the easy-to-use double exposure features in PaintShop Pro. Click below to download your free 30-day trial and create double exposure photos for free before you buy!