
How To Use Tone Mapping
Tone mapping is an image editing technique that utilizes an algorithm to scale the dynamic range of an image while maintaining the appearance of the original image. This creative effect can give you some of the benefits of HDR effects but from a single source image. Keep reading to learn how to use tone mapping with PaintShop Pro.
1. Install PaintShop Pro
To install PaintShop Pro photo editing software on your PC, download and run the installation file above. Continue following on-screen instructions to complete the setup process.
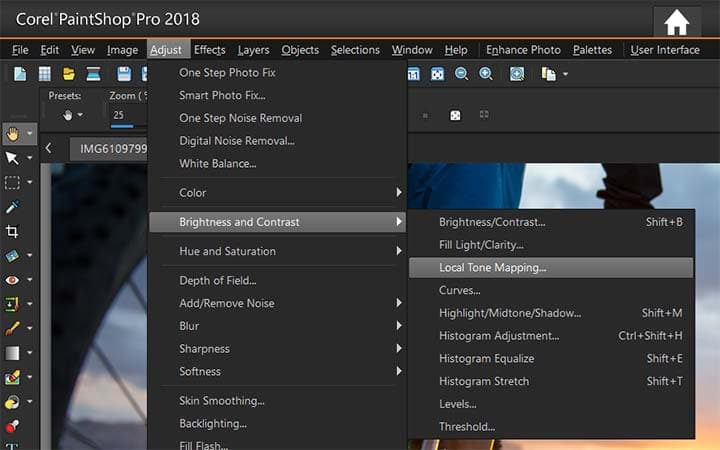
2. Invoke Local Tone Mapping
Choose Adjust > Brightness and Contrast > Local Tone Mapping. The Local Tone Mapping dialog box appears.
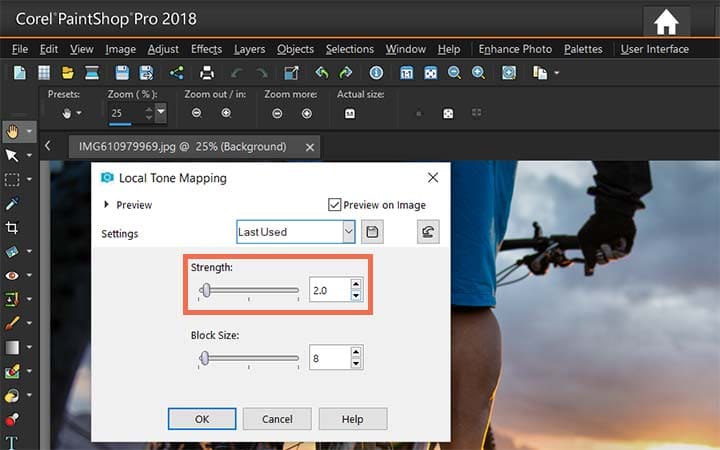
3. Adjust Strength
Type or set a value in the Strength control. Use the smallest value that produces a satisfying result. Values that are too high cause unwanted artifacts to appear in the photo. Click OK.
Download a free trial now and start using tone mapping today
PaintShop Pro's image editing tools allow you to quickly and easily use tone mapping to make awesome detailed images.
PaintShop Pro does more than just tone mapping
Check out some of the other photo editing features in Paintshop Pro, like hdr images, change image color, photo brushes, and more! Create high quality photos in a fun and easy to use photo editor and make your photos stand out more than ever.
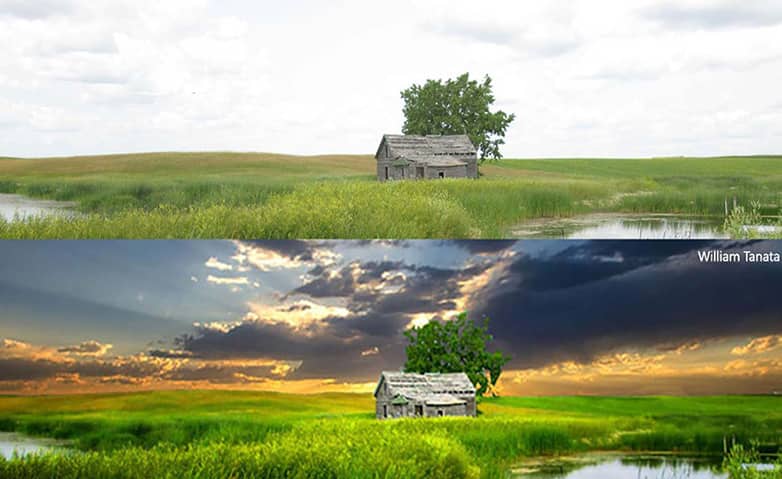 Make Hdr Photos
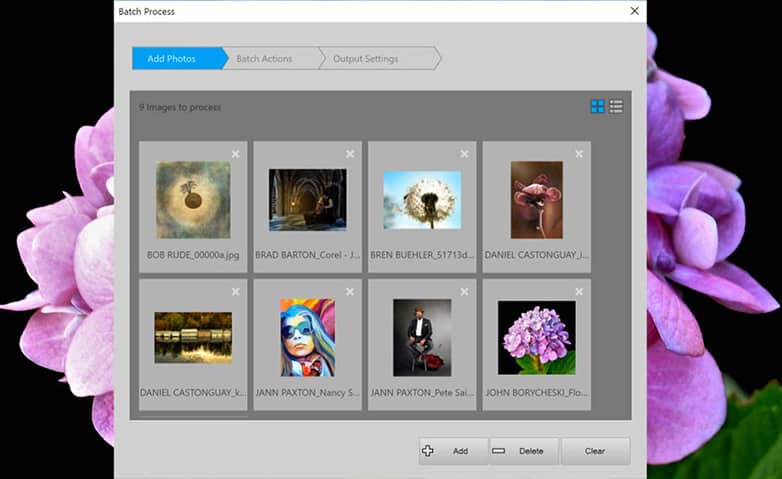 Bulk Edit Images
 Correct Image Perspective
 Remove Objects From Photo
Download the best solution for tone mapping that there is
Looking to really bring out the destail in your images? We promise you’ll love the easy-to-use tone mapping features in PaintShop Pro. Click below to download your free 30-day trial and do tone mapping for free before you buy!